
What if you could add hyper-realistic detail to any face in your project—in minutes, not hours? For creative professionals, the ability to enhance facial details in images is a crucial capability. Whether you're working on character design for games, perfecting shots for advertising campaigns, or polishing VFX sequences, facial enhancement can make the difference between good and exceptional work.
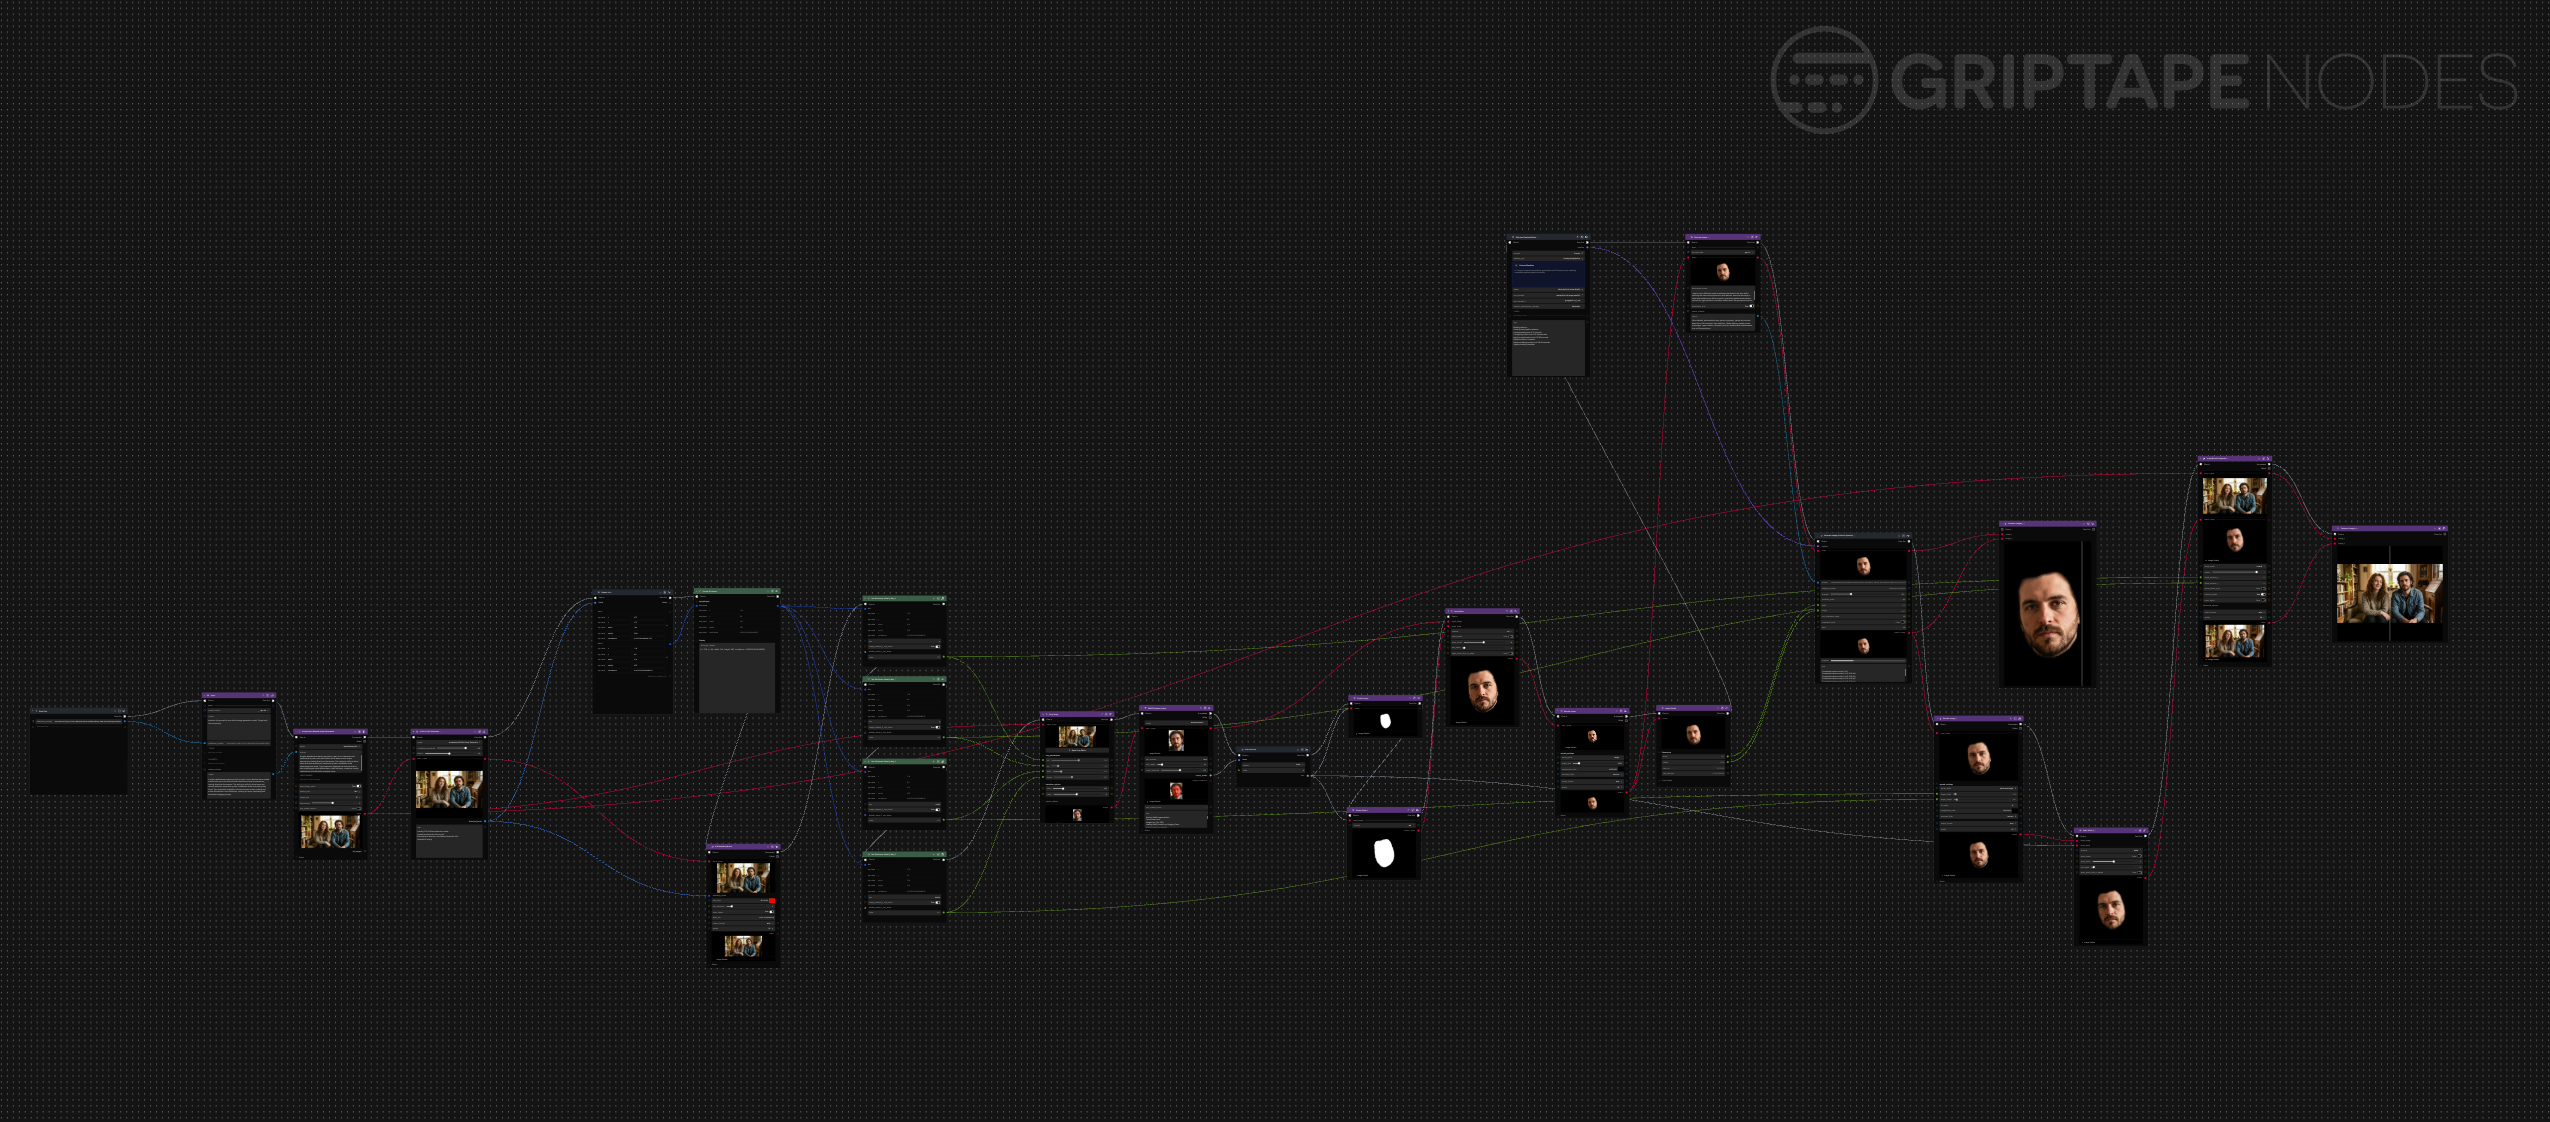
This workflow demonstrates the power of combining multiple AI models in a single pipeline. We'll use face detection algorithms, advanced diffusion models specialized for facial enhancement, and sophisticated compositing techniques to achieve professional-grade results. The entire process is built using Foundry Griptape, which provides a visual workflow environment that makes complex AI pipelines accessible to creative professionals without requiring deep technical expertise.
Phase 1: Source Image Preparation
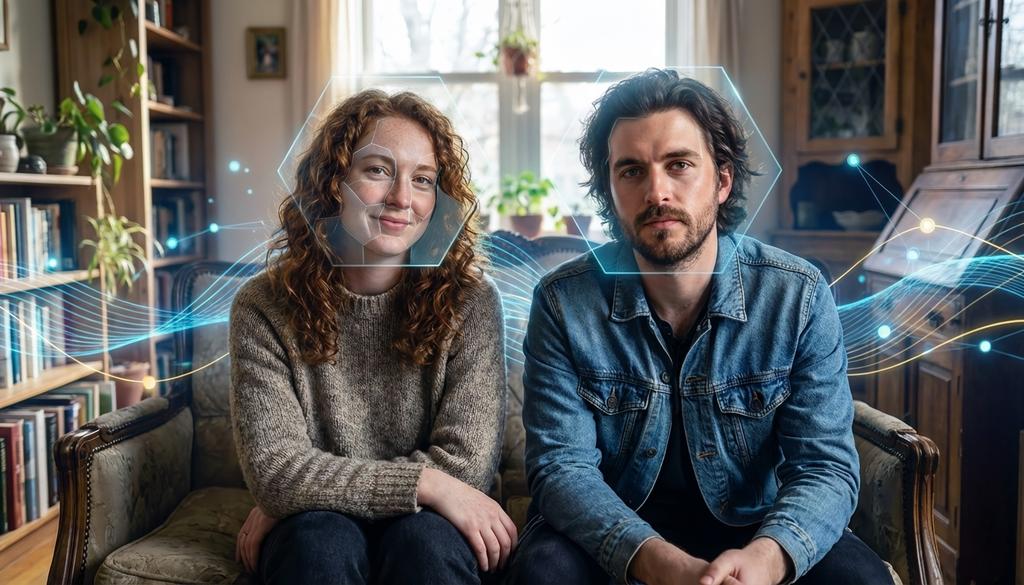
The workflow begins with generating or preparing your source image. For this example, we'll start with an AI-generated image using Google's Nano Banana Pro model, though this technique works equally well with photography, video frames, or any existing imagery you need to enhance. The initial prompt used here is straightforward: "a portrait of a pair of non-identical twins seated side by side and looking at the camera."
To maximize the quality of our generated starting point, we use an agent-based prompt enhancement step. This technique involves feeding your basic prompt to an AI agent with instructions to "enhance this prompt for use with an image generation model, output only the new prompt." The agent, powered by GPT-4, transforms the simple description into a more detailed and effective prompt that produces higher-quality source material. This enhanced prompt is then used with Google's Nano Banana Pro model with 16:9 aspect ratio at 1K resolution to generate our synthetic twins image.
Phase 2: Precision Face Detection (YOLO V8)
The first technical step involves identifying faces within your image using the YOLO V8 face detection model from Ultralytics, which is available via the YOLOv8 Node in the Griptape Nodes Advanced Media Library. This model provides several configurable parameters that directly impact your results:
- Confidence Threshold: Determines how certain the model must be before identifying a region as a face.
- Dilation Parameter: Controls the spacing of the bounding box placed around detected faces.
The face detection process outputs a list of dictionaries, each containing the coordinates, dimensions, and confidence scores for detected faces. To visualize the detection results, you can render bounding boxes directly onto your image using the Bounding Boxes node. This visualization step is invaluable for understanding how effectively the detection model has performed and whether you need to adjust parameters for your specific image.
Each detected face is represented by a dictionary containing X and Y coordinates for the top-left corner of the bounding box, along with width and height dimensions. The confidence key provides a float value indicating how certain the model is about each detection. For this workflow, we'll extract these values using dictionary extraction nodes and focus on enhancing one of the detected faces.

Phase 3: Isolate and Mask with SAM3
Once you've identified the face you want to enhance, the next step involves cropping it from the original image using the extracted coordinates and dimensions. The crop image node takes the X, Y, width, and height values to isolate the specific facial region you want to work with. This cropped face becomes the foundation for all subsequent enhancement operations.
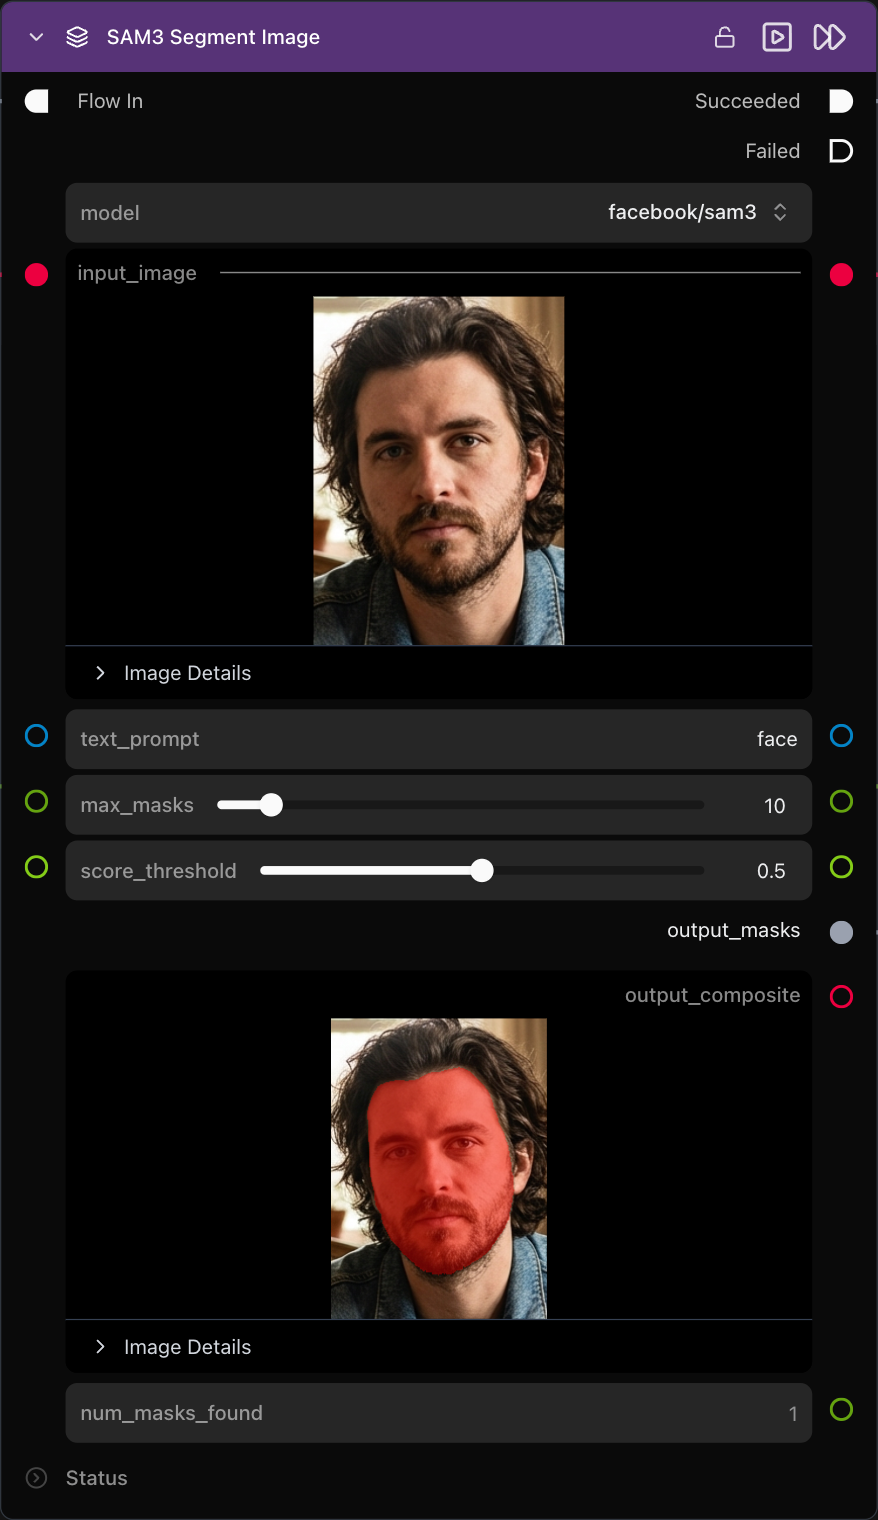
To create a precise mask for the facial features, we employ Meta's SAM3 (Segment Anything Model 3), a third-generation foundation model for computer vision tasks. This model, released by Meta AI late in 2025, provides exceptional segmentation capabilities. Using the SAM3 node from Griptape Nodes' extension library with the simple prompt "face," we generate a detailed mask that precisely outlines the facial features within our cropped image.
The generated mask is then applied using the Apply Mask node, which masks off everything except the facial features. This ensures that when we apply our enhancement mode to the image, we're operating exclusively on the face, preventing unwanted modifications to background elements or clothing that might be visible in the cropped region.
Phase 4: Scaling for Pixel Real Estate
Before applying the enhancement model, we need to create additional pixel real estate for the AI to work with. Using the rescale image node, we enlarge the masked face from its original dimensions to a larger format. In this example, a face originally measuring 214 by 297 pixels is scaled up to 737 by 1024 pixels using height resize mode with a target size of 1024 pixels.
It's important to understand that this is not an AI upscaling operation. Instead, we're simply creating additional space in the image without adding algorithmic detail. This larger canvas provides the diffusion model with more pixels to work with when generating enhanced facial details, resulting in higher quality output that can later be scaled back down to fit the original image dimensions.
Phase 5: The Enhancement Engine (Krea BLAZE)
The heart of this workflow lies in the facial enhancement process, which uses a specialized diffusion model called Krea BLAZE. This model is a custom checkpoint of Flux.1 Krea Dev that has been specifically optimized for speed and specialized to produce natural, detailed, and realistic skin textures and lighting. The choice of model is crucial here, as generic diffusion models may not preserve facial proportions and characteristics as effectively.
To generate the most effective prompt for the enhancement process, we use a technique involving multimodal AI analysis. The masked face image is fed to OpenAI’s GPT-4o multimodal model with specific instructions: "I want to use a diffusion model to enhance the detail of this face while retaining the exact same proportions and features. Describe the image in detail and include terms that are useful in performing detail enhancements such as 4K, high resolution, and other similar terms. Prompt must be no more than 77 tokens in length."
This approach ensures that the enhancement prompt is both highly relevant to the specific face being processed and optimized for the token limitations of the Krea BLAZE model. This effectively delegates the most challenging part (writing the perfect diffusion prompt) to an AI, ensuring the resulting prompt is bespoke for the specific face in the image. The resulting prompt typically includes terms like "ultra detail," "photo realistic face," and "perfect symmetry," which guide the diffusion model toward producing the desired enhancements.
The generate image diffusion pipeline node from Griptape Nodes' advanced media library processes the masked face using this generated prompt along with other carefully configured parameters. The result is a new facial image that maintains the same structure and proportions as the original while adding significant detail improvements, smoother complexion, and enhanced features that take advantage of the additional pixel resolution.
Seamless Compositing Back to Original
The final phase involves integrating the enhanced face back into the original image seamlessly. This process begins by scaling the enhanced face back down to match the dimensions of the original cropped face, ensuring perfect alignment during compositing.
To achieve a natural-looking blend, we reapply the facial mask with slight modifications. The mask is grown slightly to create a smaller visible area for the enhanced face, which produces a smooth blur effect around the edges. This technique prevents harsh boundaries that could make the enhancement obvious and unnatural.
The image blend compositor node handles the final integration, using the blend position attributes extracted from the original bounding box coordinates. This ensures that the enhanced face is positioned precisely where the original face was located in the source image. The compositor seamlessly merges the enhanced facial details with the original image, creating a final result where the improvement is dramatic but natural-looking.

The Future of Creative Work
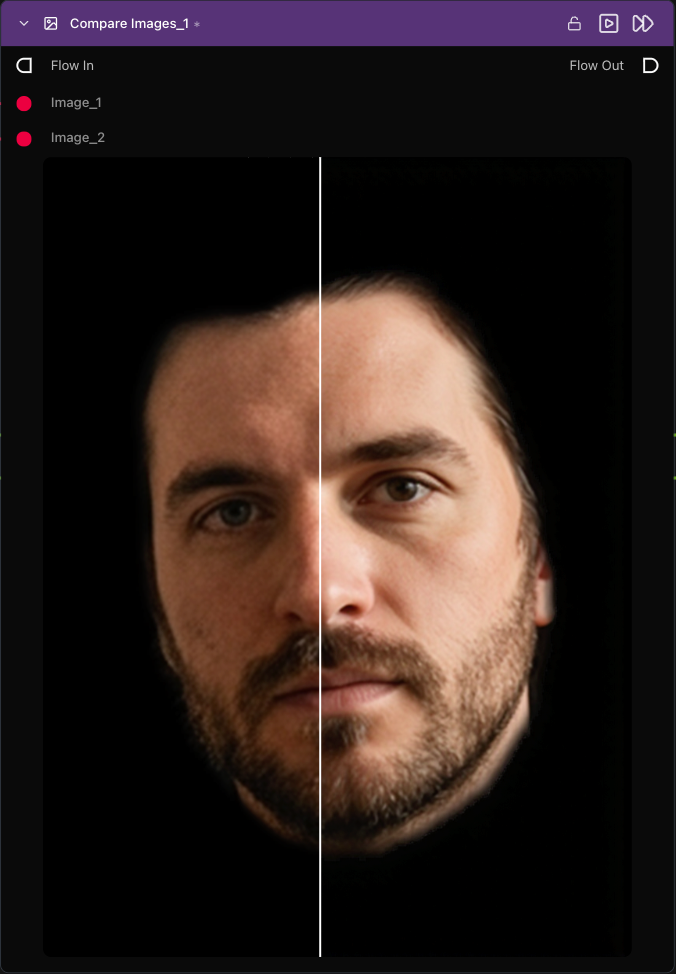
The completed workflow demonstrates the dramatic power of combining multiple specialized AI models in a coordinated pipeline. The enhanced face shows significantly improved detail, smoother skin textures, and better overall quality while maintaining the original facial structure. This seamless integration means the enhancement appears natural and unforced, which is crucial for professional applications.
This facial enhancement workflow represents just one example of how modern AI tools can be orchestrated to solve complex creative challenges. The visual, node-based approach makes it possible to build sophisticated pipelines without deep programming knowledge, while still maintaining the flexibility and control that professional work demands.
Stop spending hours on manual retouching. The combination of face detection, segmentation, specialized enhancement models, and intelligent compositing creates results that would have required extensive manual work or expensive specialized software just a few years ago. Now, these capabilities are accessible to any creative professional willing to explore the possibilities of AI-powered workflows. The future of creative work is visual, intuitive, and powered by AI. Click here to visit griptapenodes.com and start building your first advanced AI workflow today.