

Generative AI is transforming creative industries, but true customization often feels out of reach, especially when working with large diffusion models. Enter LoRAs (Low-Rank Adaptation): a breakthrough technique that lets you adapt and personalize AI models quickly, without the need for expensive retraining. If you’re looking to create consistent characters, unique image styles, or simply want more control over your output, LoRAs could be your new best friend.
With the new Diffusion Pipeline Builder in Griptape Nodes, using LoRAs is simpler than ever. Here’s how you can start using them.
Step 1: Setting Up Your Diffusion Pipeline
Griptape Nodes is a drag-and-drop interface for building creative AI workflows visually. To begin, add a Diffusion Pipeline Builder node to your canvas. This node is your foundation for image generation and customization using diffusion models that are built with the Hugging Face Diffusers Library. Once you’ve placed your Diffusion Pipeline Builder node, select your provider. You will be prompted to download any required models once you select your provider.
You should note that LoRAs are provider-specific, meaning that LoRAs for FLUX will only work with FLUX pipelines and models. This won’t necessarily constrain your creativity though, because, at the time of writing, a search for models containing ‘LoRA FLUX’ on Hugging Face Hub returns 4,159 results.
Step 2: Loading LoRAs with the Load LoRA Node
Next, to use a LoRA with your diffusion pipeline, add a Load LoRA node to your workflow. This node lets you specify the file path to your chosen LoRA, which is typically a `.safetensors` file. If you’re sourcing LoRAs from Hugging Face Hub, Griptape’s model management feature makes it super-easy to download LoRAs from there. If you use this feature, the .safetensors files for your newly downloaded LoRA will be stored in a directory in the `.cache/huggingface/hub` directory in your home directory, or whatever you have set in your HF_HUG_CACHE environment variable.
Say I download the XLabs-AI/flux-RealismLora LoRA, then I can find the .safetensors file in ~/.cache/huggingface/hub/models--XLabs-AI--flux-RealismLora/snapshots/1965e17d2e745fcbf8f4004bdbdf603421ef37a8, assuming I haven't set up a custom location via my HF_HUG_CACHE environment variable.
Once you’ve added a Load LoRA node to your workflow, either paste the complete file path to your LoRA’s .safetensors file into the Load LoRA node, or navigate to the correct directory by clicking the folder navigation icon in the node, selecting the .safetensors file, and clicking Select File. This will populate the full path to the .safetensors file into the file_path parameter.
Some LoRAs benefit from having a trigger phrase set (for example, “miniature world” for a miniature style). If this is the case for the LoRA that you are loading, enter this phrase in the Flux LoRA File node’s trigger_phrase parameter and then use this trigger phrase in your generation prompt to activate the desired effect.
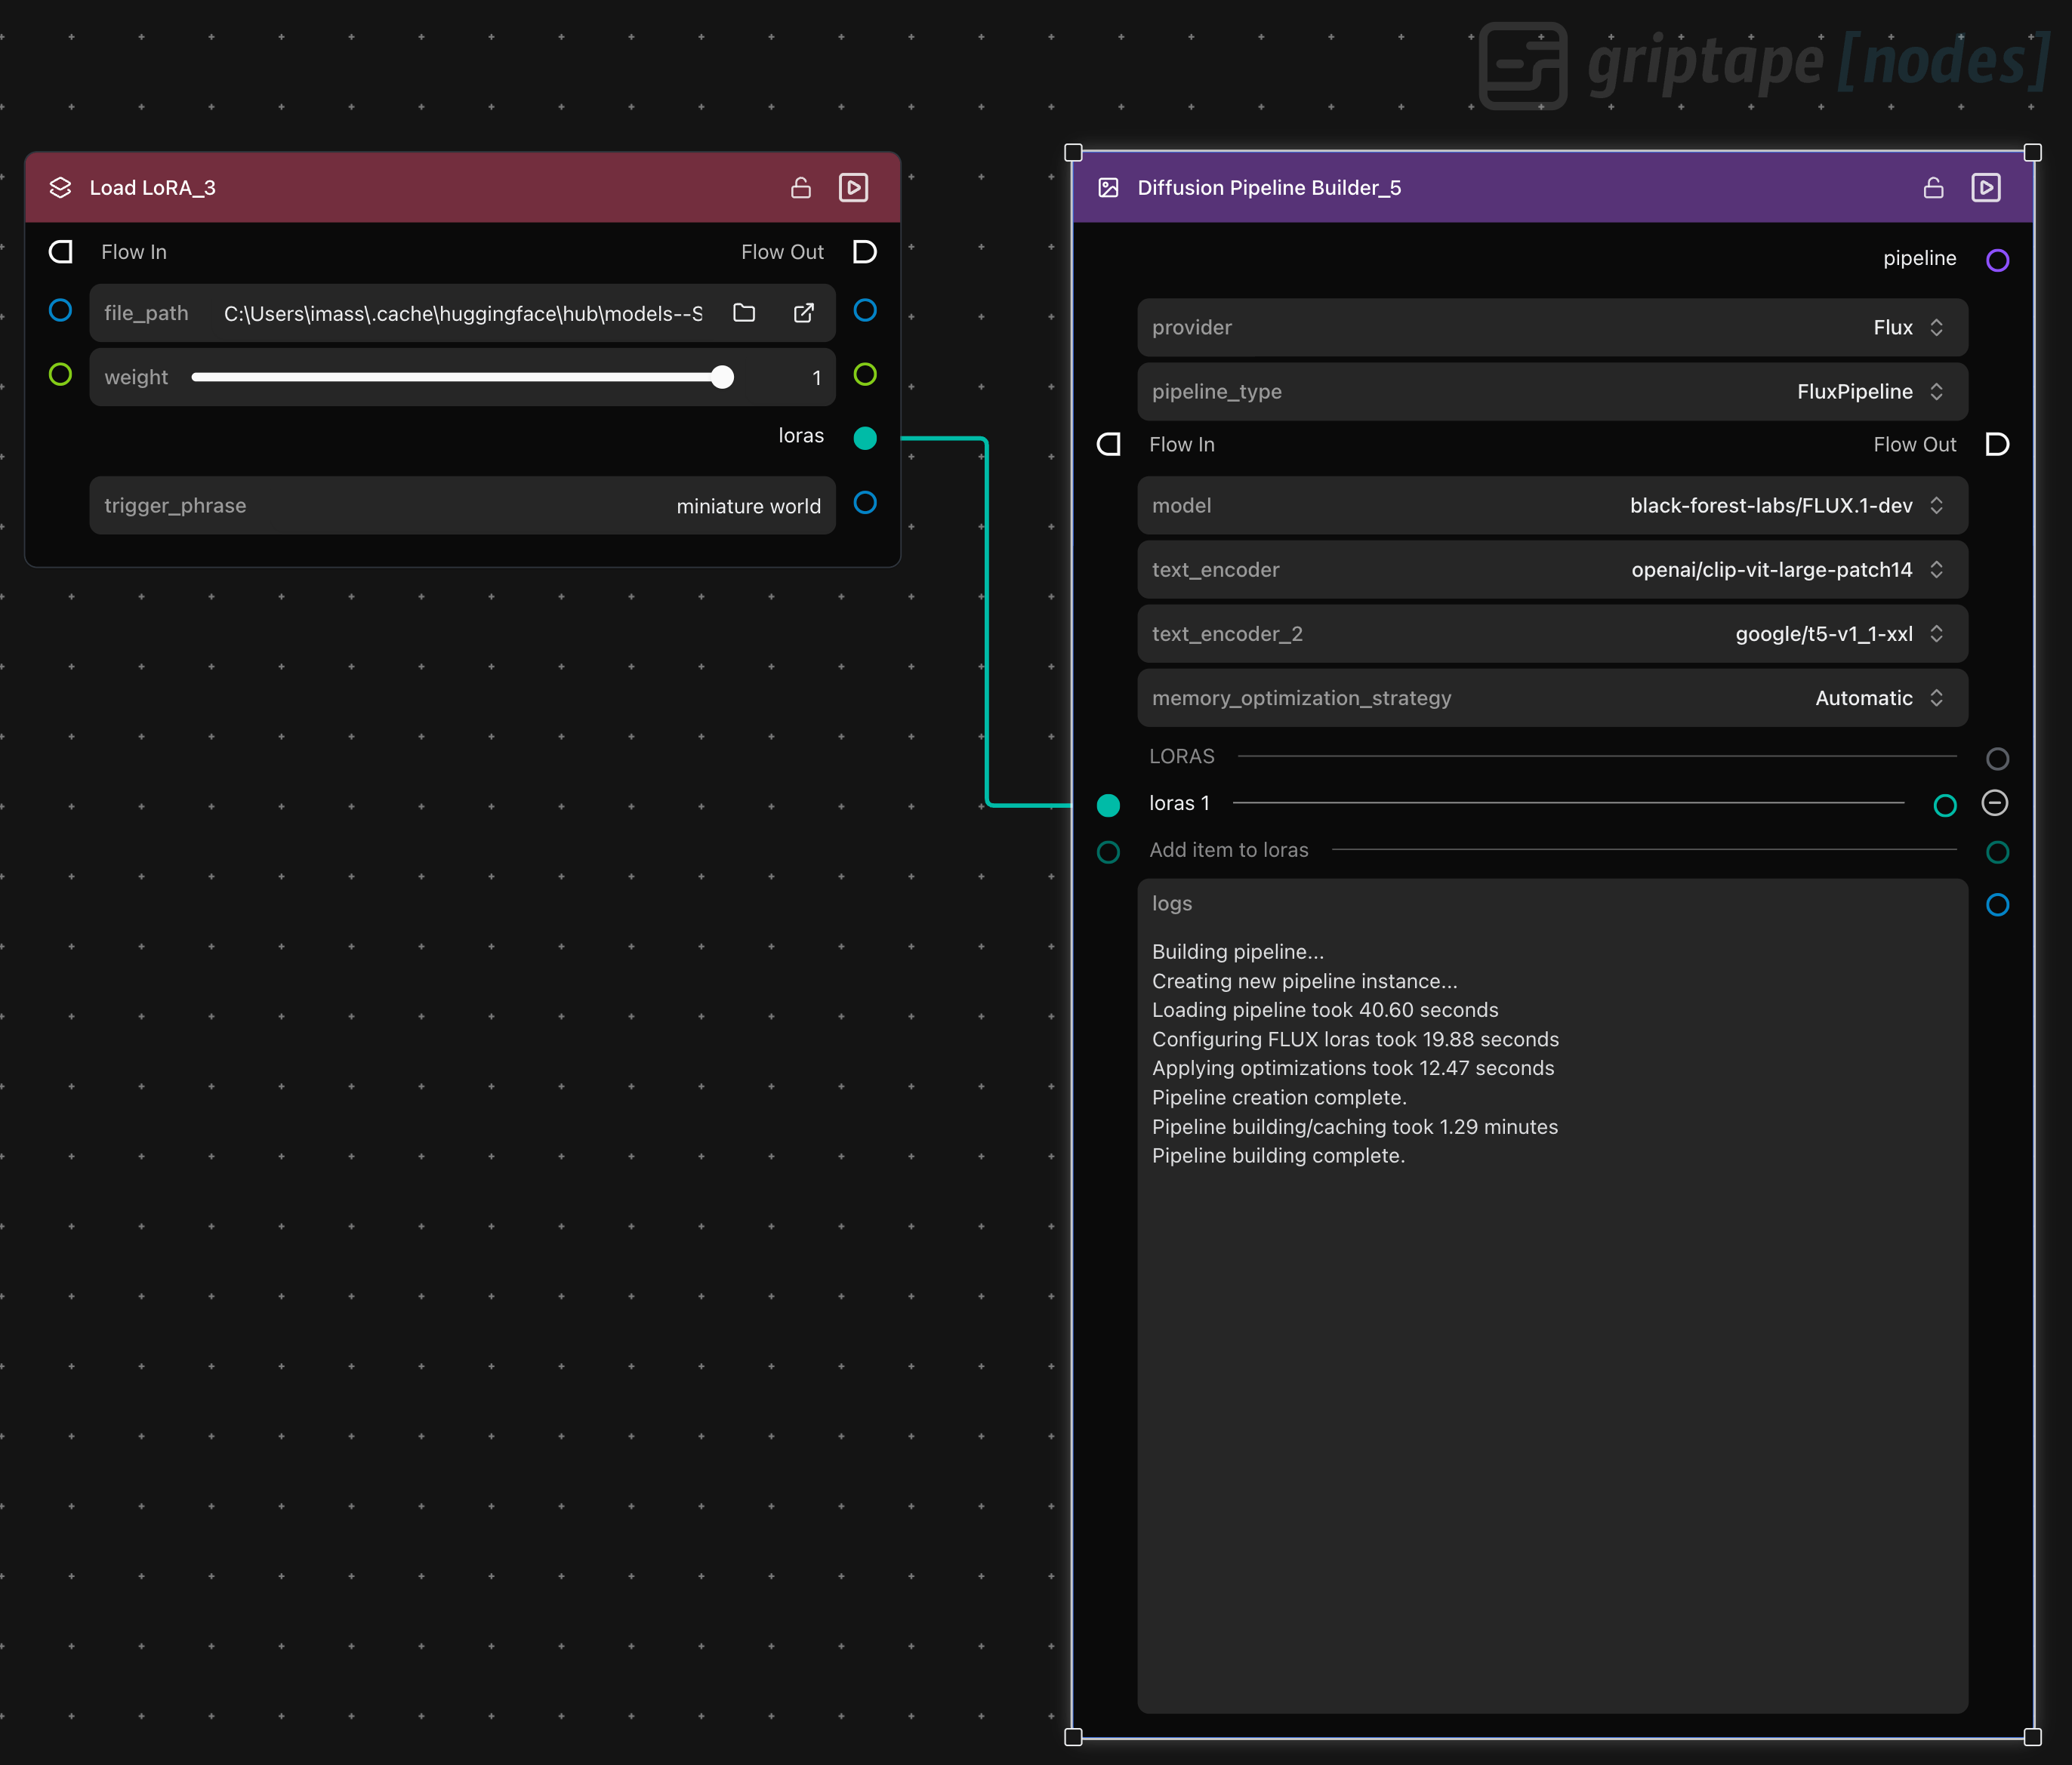
Step 3: Connecting and Combining LoRAs
Link the output of the Load LoRA node to the loras input of your diffusion pipeline. You can combine multiple LoRAs by adding more Load LoRA nodes, with each one fine-tuning your model in a different way, and adding these to your pipeline via the loras input. For example, you might want to counter shallow depth of field with “anti-blur” and enhance realism in a single pipeline step.
Step 4: Using your pipeline for Image Generation
Once your pipeline is set up, add a Generate Image (Diffusion Pipeline) node to your canvas and connect the pipeline output of the Diffusion Pipeline Builder node to the pipeline input of the Generate Image node. Once you’ve done this, you're ready to add a prompt to your image generation node. You’ll see log message output appear in the log parameter of the Diffusion Pipeline Builder node as the pipeline is loaded, FLUX LoRAs are configured and pipeline creation is completed.
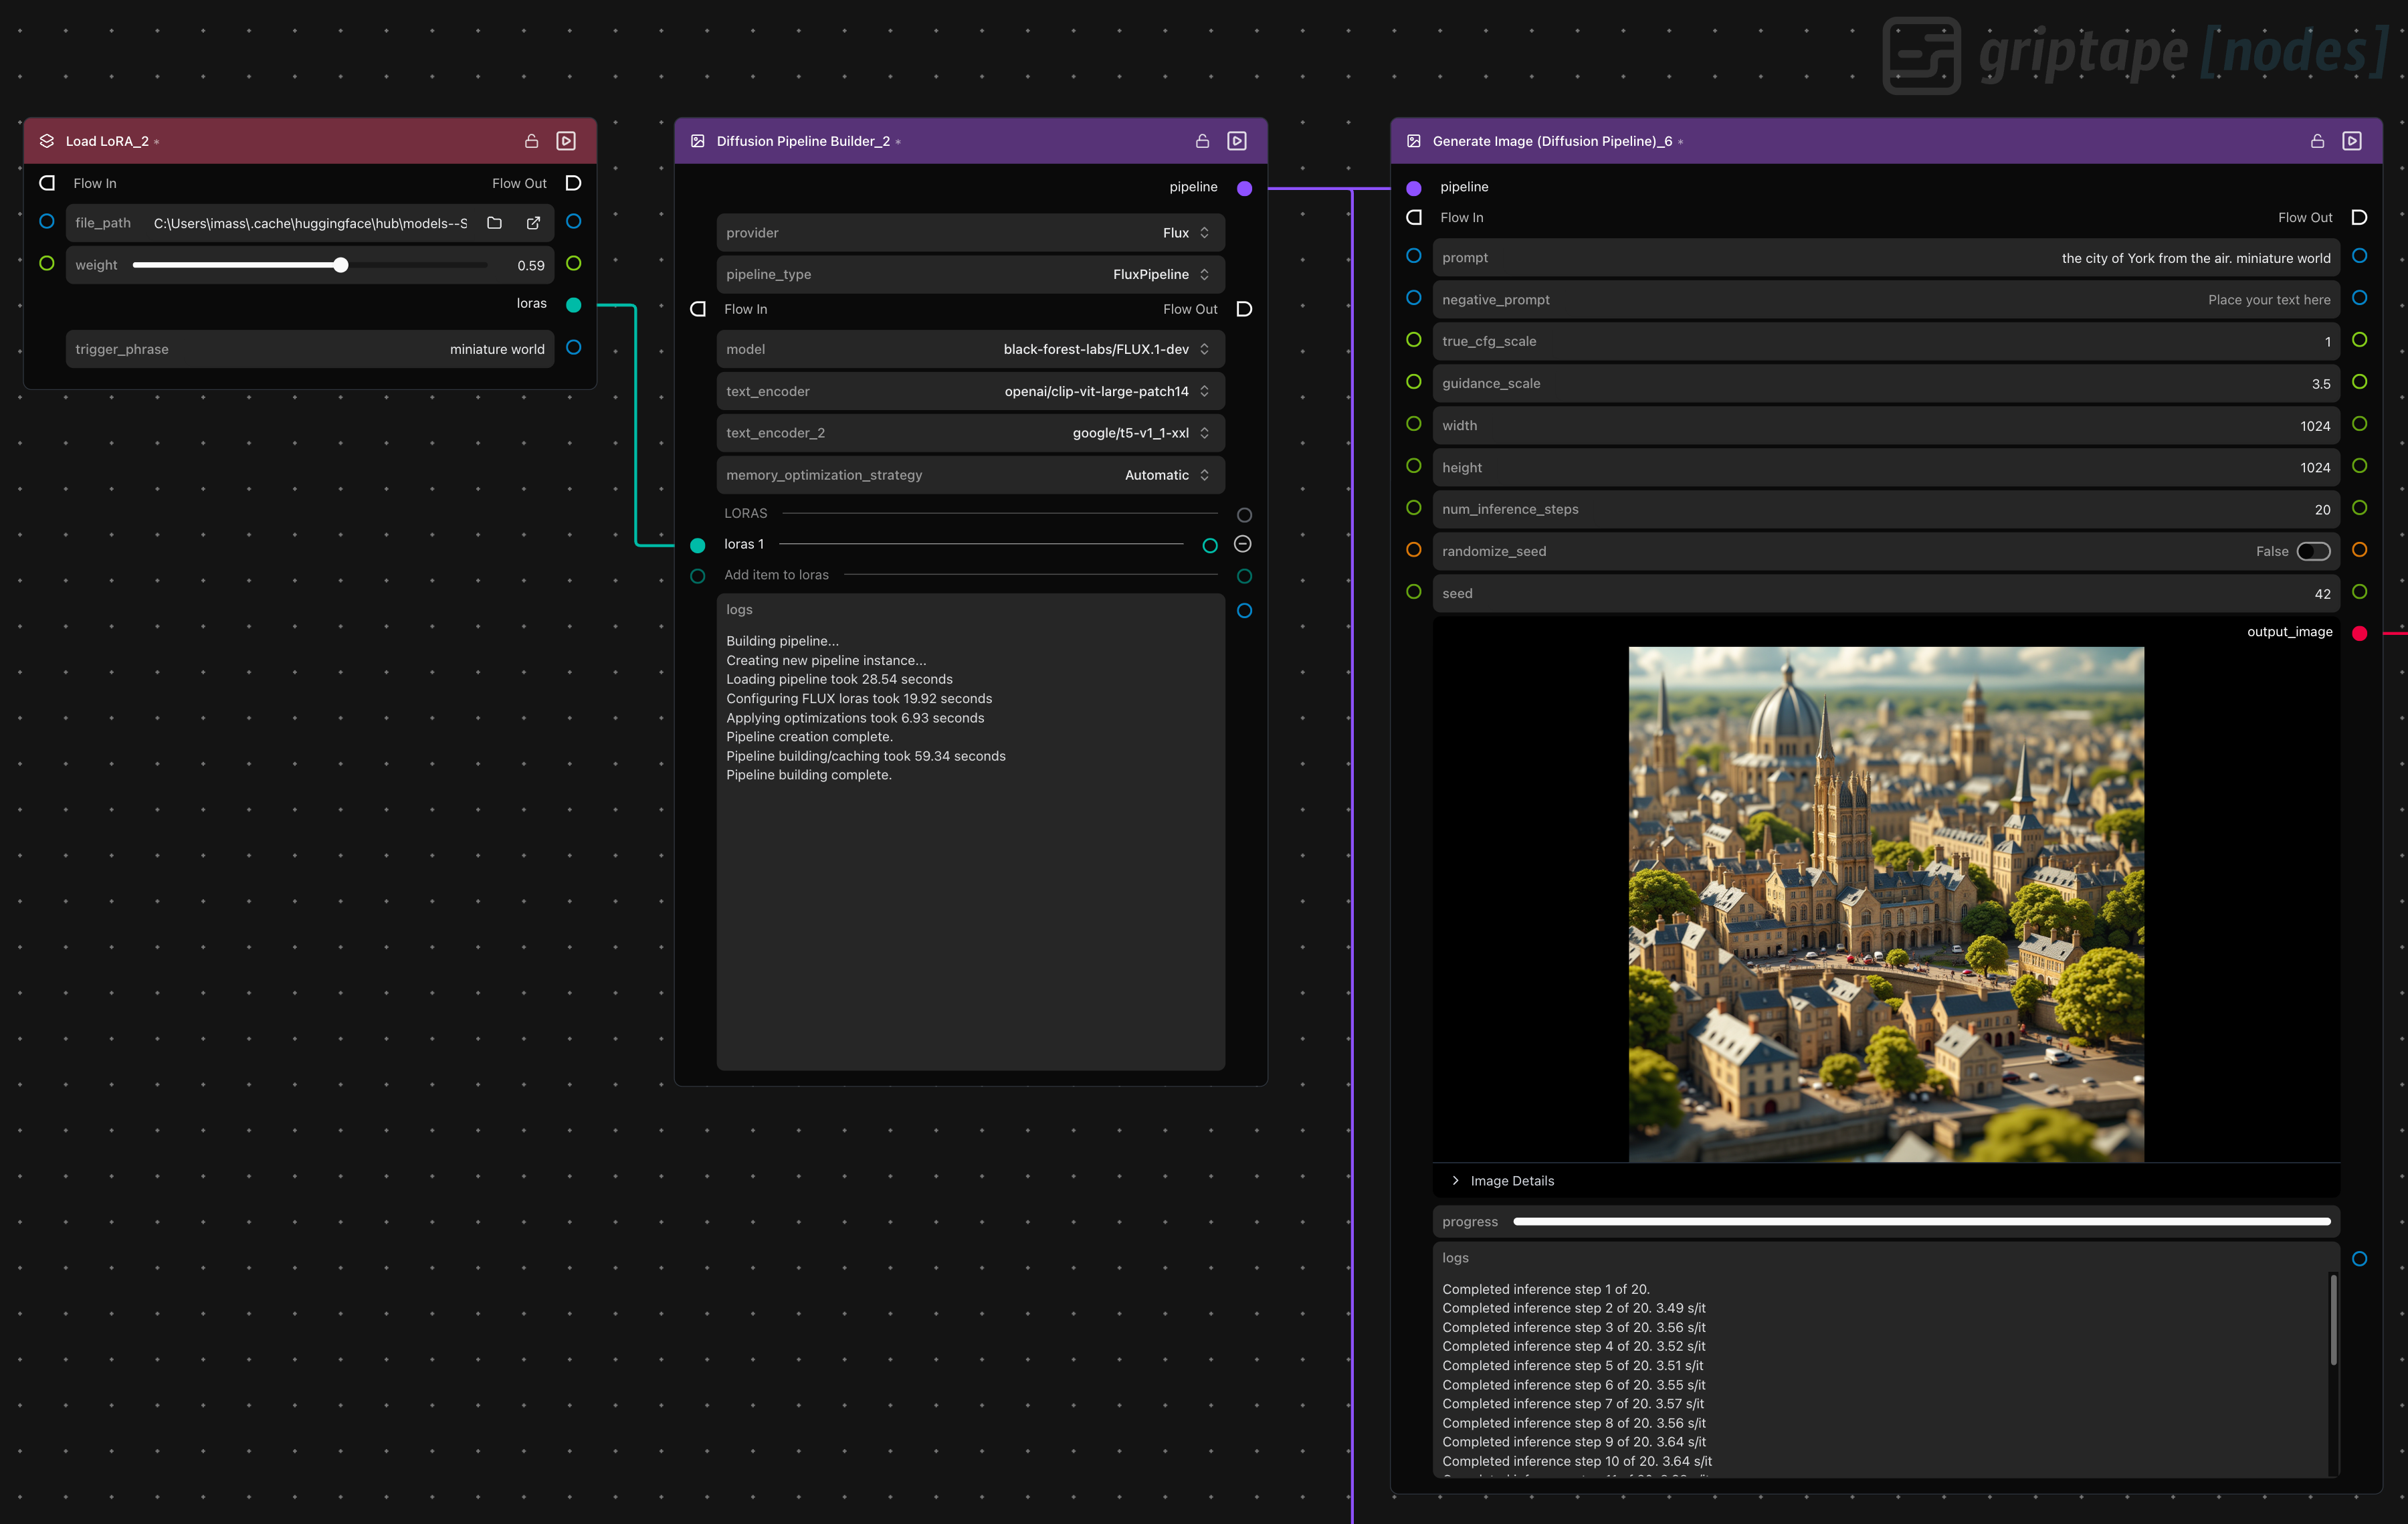
You can reuse the same pipeline node across multiple image generation nodes, allowing you to experiment with different prompts or output resolutions, or with triggering different LoRAs if you’ve added more than one LoRA to your pipeline.
Remember that each model is likely to have its own specific set of LoRAs. In the example below you can see a specific LoRA being used with the FLUX.1-Kontext-dev image editing model. In this case, it's the drbaph/Fluffy-kontext-LoRA that we're using to 'fluffy-ize' a logo or object that we provide in an input image.

Check out this video for a quick example of a complete Griptape Nodes workflow that uses LoRAs with FLUX pipelines for image generation and upscaling.
Ready to push the boundaries of generative AI? Visit www.griptapenodes.com to sign up, join the community, and start building your next creative breakthrough. If you have questions or want to see more examples, hop onto our Discord. Our team is ready to help you get started.