
Ever wondered how creative teams whip up those captivating storyboards for advertising videos? Today, we’re pulling back the curtain and showing you how to build your own image-based storyboard, with no artistic skills required! With Griptape’s flow-based editor and the magic of Runway's image generation models, you can bring your vision to life, one node at a time.
Taking inspiration from Runway’s AI for Advertising series, let’s dive into a real-world example: crafting a storyboard for a hiking holiday advert set in the breathtaking Scottish Highlands. Whether you’re a marketer, creative director, or just a tech enthusiast, you’ll love how easy (and fun!) this process can be.
Setting the Scene: The Power of Reference Images
Our journey begins with one simple text prompt:
sketched storyboard style black and white image of a man in hiking gear looking out over the Scottish Highlands? It should be a medium shot profile image of the man
Using Griptape’s text input node, we feed this prompt into a Runway text-to-image node. Runway’s models are fantastic at using reference images, so the result is a striking, medium-shot profile of our hiker, which is just the vibe we’re after. This image becomes our style anchor, ensuring every subsequent frame feels like part of the same story.
Using the brand new Node Locking feature in Griptape Nodes, we can lock this node once we’re happy with the image that it generates, ensuring that the image is not modified by future workflow runs. This also has the helpful side-effect of reducing time that it takes for our flow to run, allowing us to iterate on the rest of the flow more quickly.
.png)
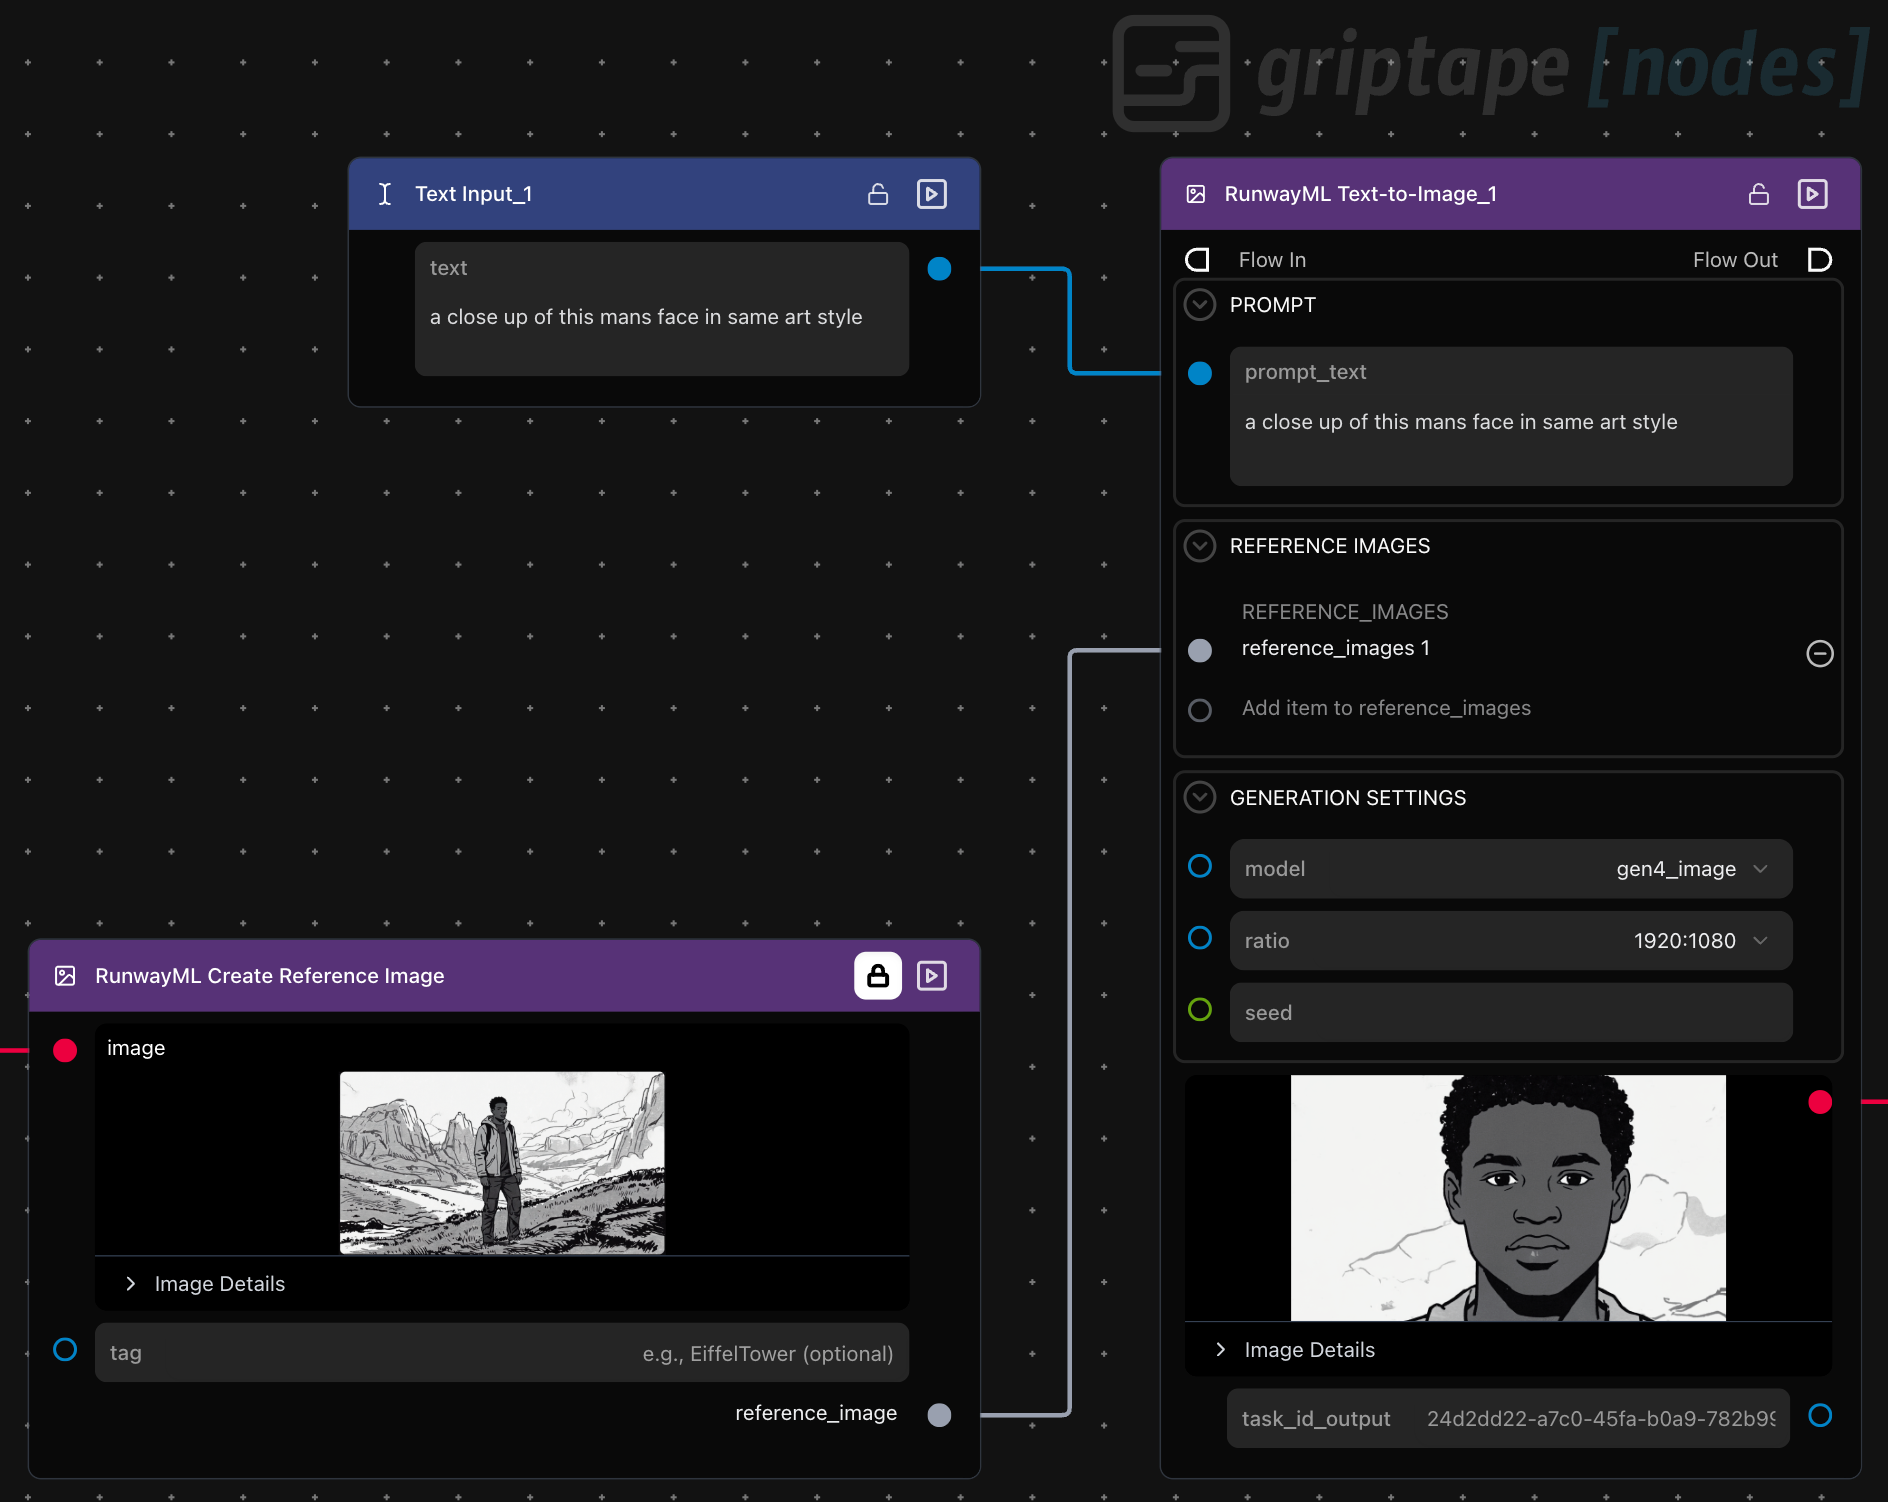
Zooming In: Character Close-Ups
With our reference image in hand, it’s time to get up close and personal. To do this, we add a Runway Create Reference Image node, and then use another text-to-image node, this time feeding in the medium shot original image as a reference and prompting for:
a close-up of this man’s face in the same art style
The result? A detailed, expressive portrait that matches our established style.
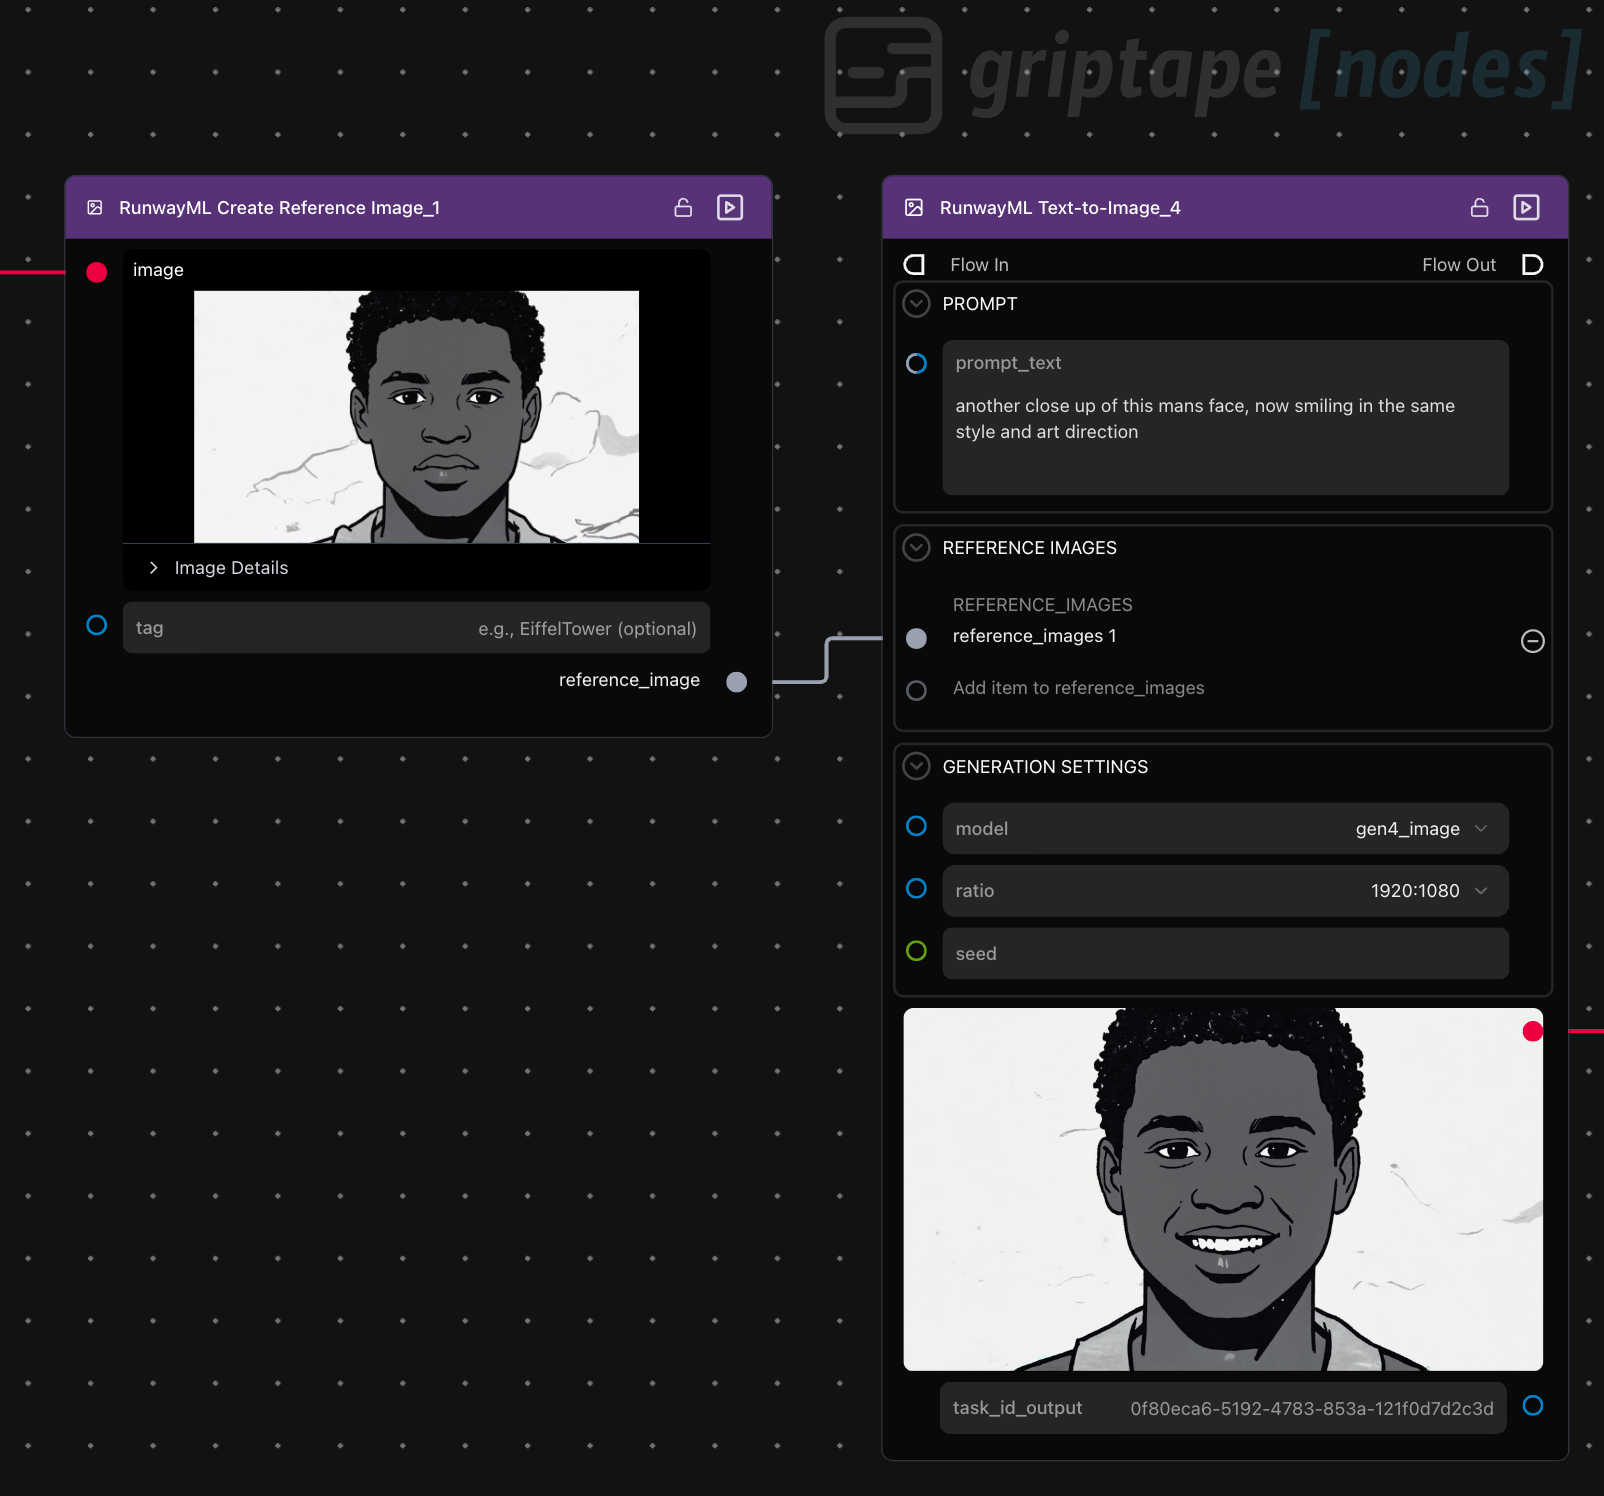
But why stop there? Let’s add some emotion! We create a new reference image, using the image of the man's face as the input and use that new reference image with a new prompt:
another close-up of this man’s face, now smiling, in the same style and art direction
The output is a warm, inviting smile that brings our character to life.
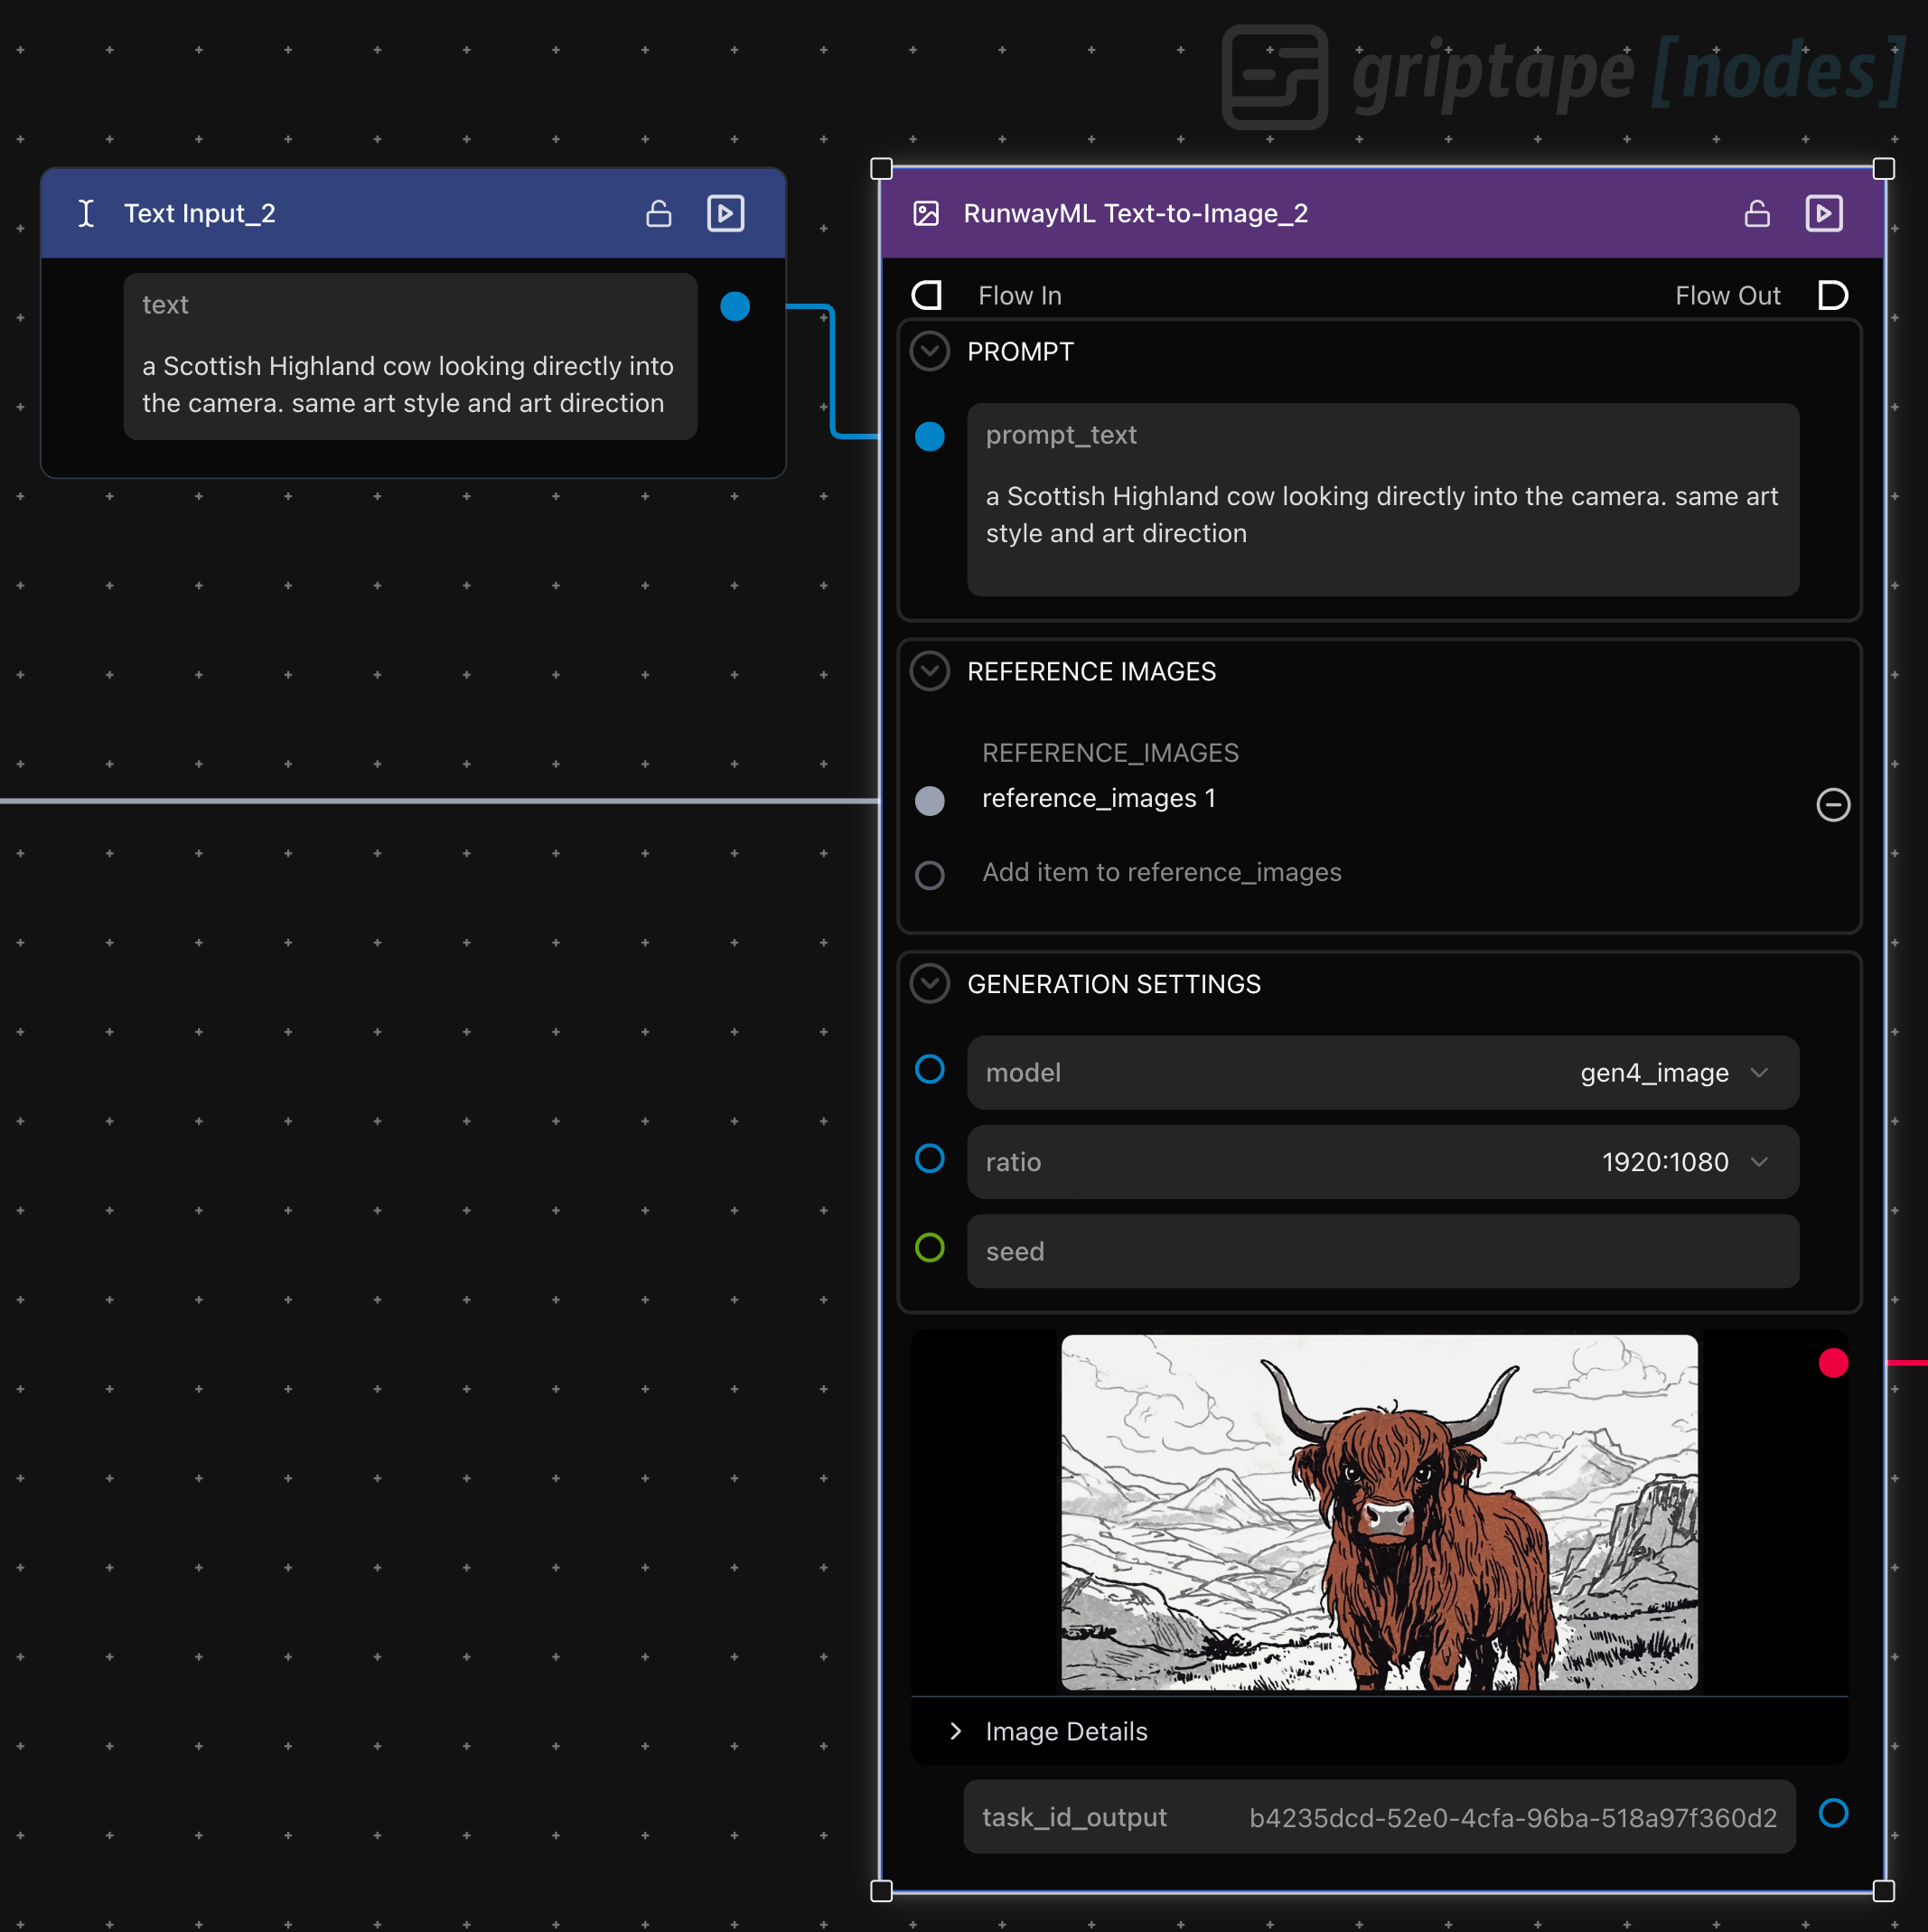
Adding Local Flavor: The Highland Cow
No Scottish Highlands adventure is complete without a Highland cow cameo! Reusing our trusty reference image, we prompt Runway to generate an image of:
a Scottish Highland cow looking directly into the camera. same art style and direction
The result is both charming and cohesive, tying our storyboard together visually.
Leveling Up: Batch Scene Generation with ForEach Nodes
Now for some real Griptape magic. Instead of creating each scene one by one, we use a text list node to define several prompts for different storyboard moments. Enter the for-each start and end nodes. These handy tools let us iterate over our list, automatically generating a new image for each prompt and outputting a list of images.
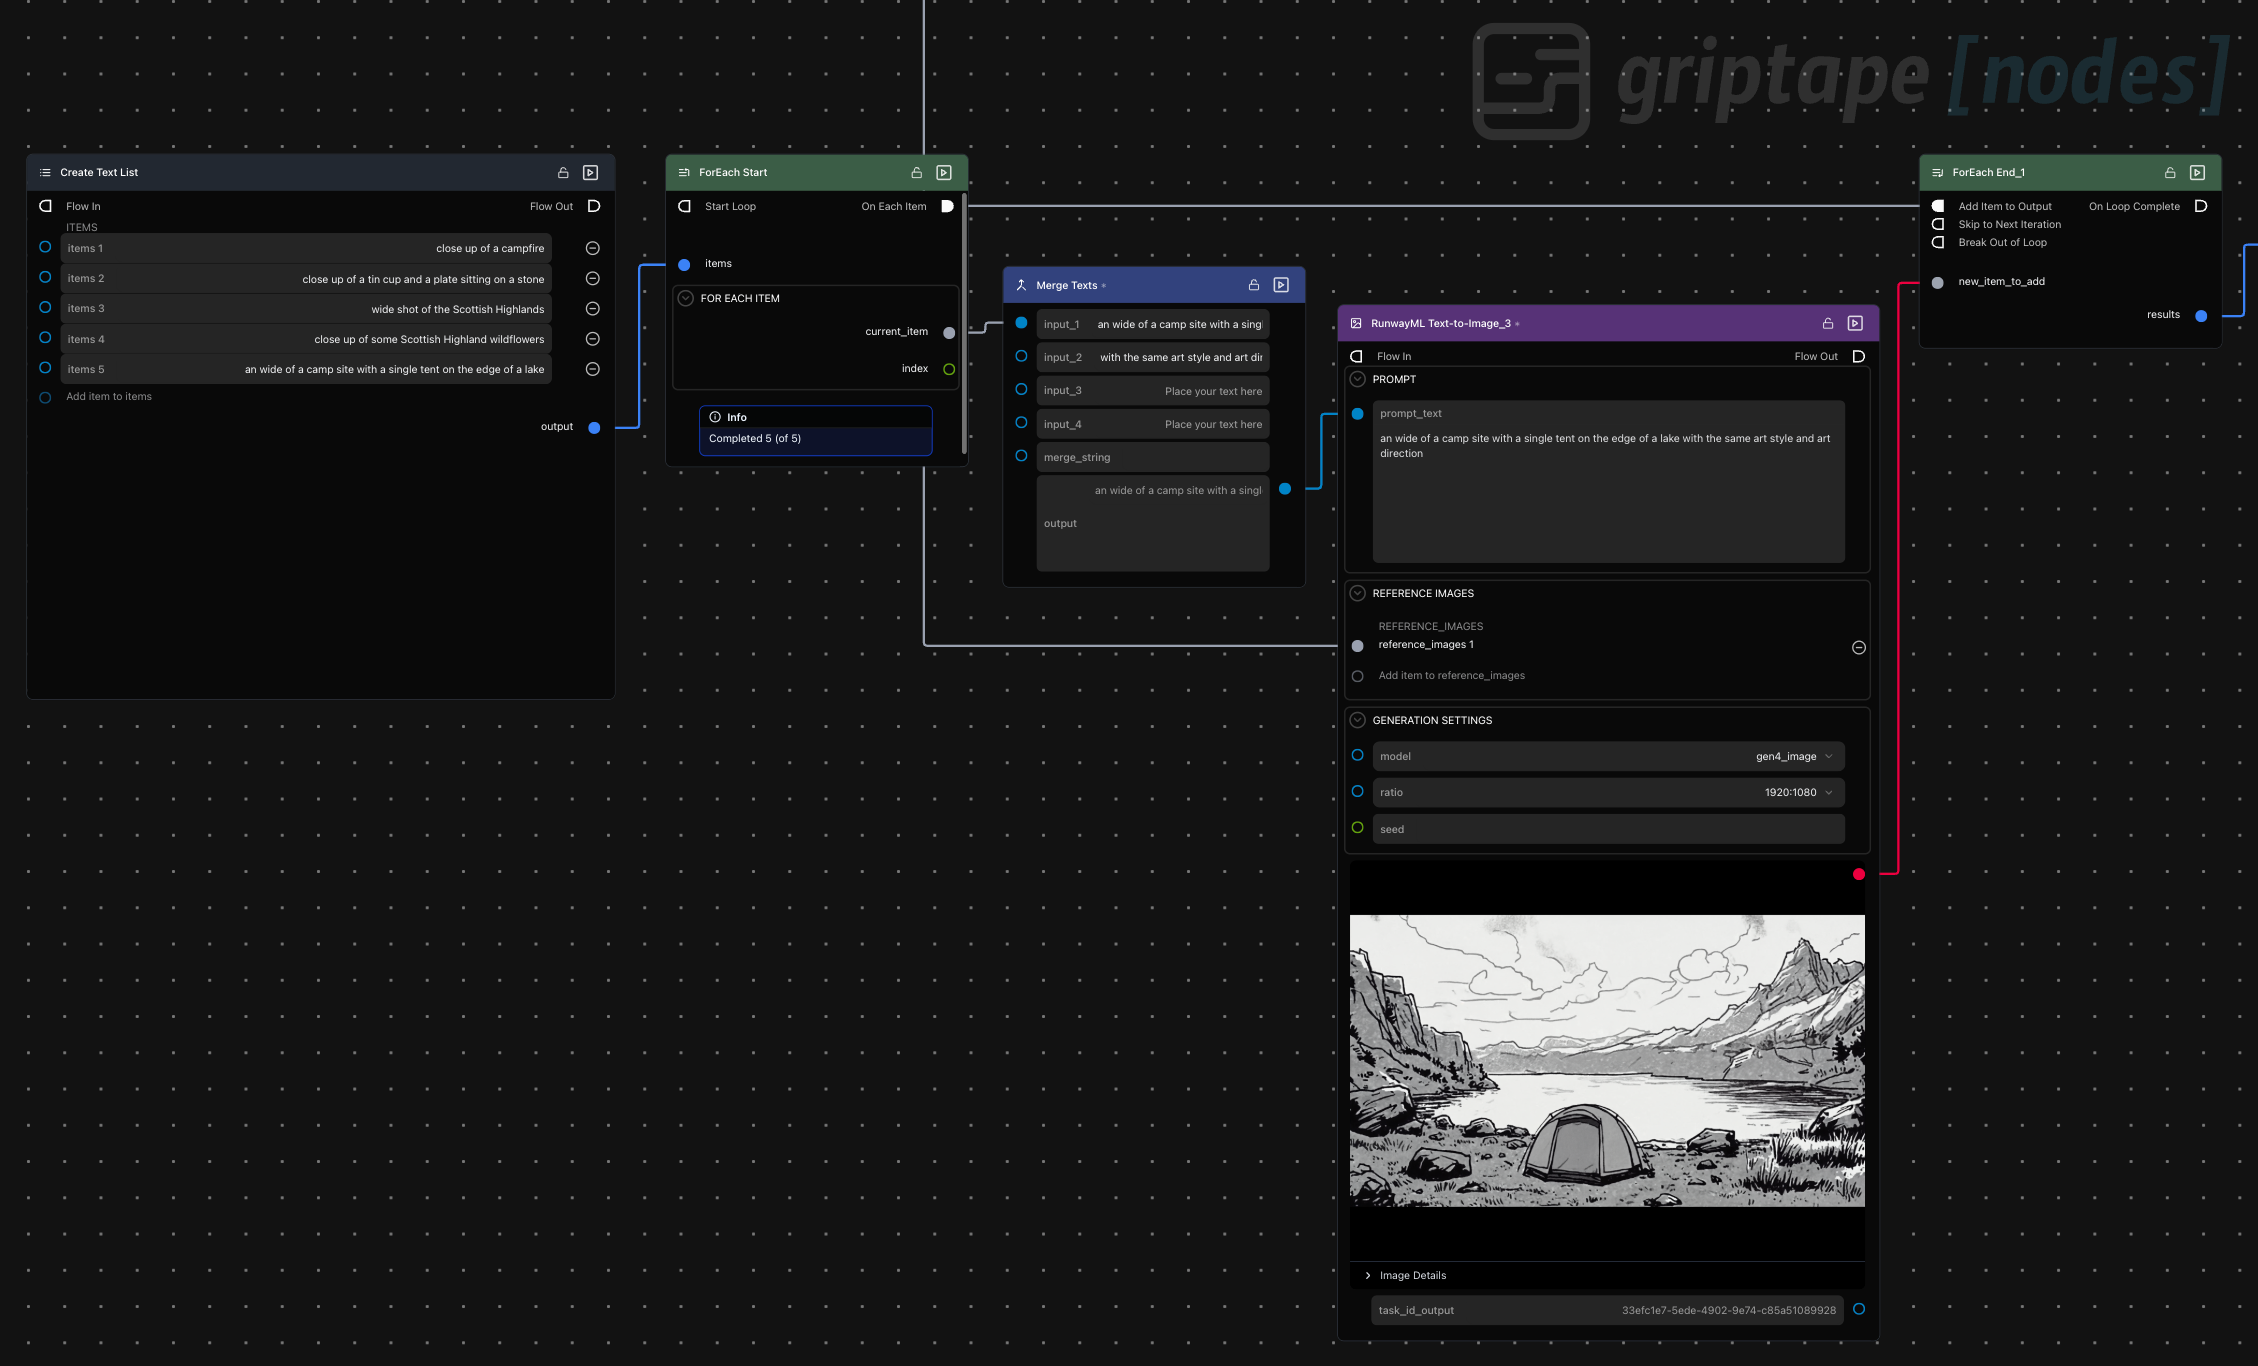
Here’s how it works:
- Each prompt in our list is merged with the suffix “with the same art style and art direction.”
- The merged prompt and our reference image are sent to a Runway text-to-image node.
- The process repeats for every item in the list, producing a series of images that all share a consistent look and feel.
For example, one prompt might be:
a wide shot of a campsite with a single tent on the edge of a lake with the same art style and art direction
Each scene is generated in sequence, building out the visual narrative of our advert.
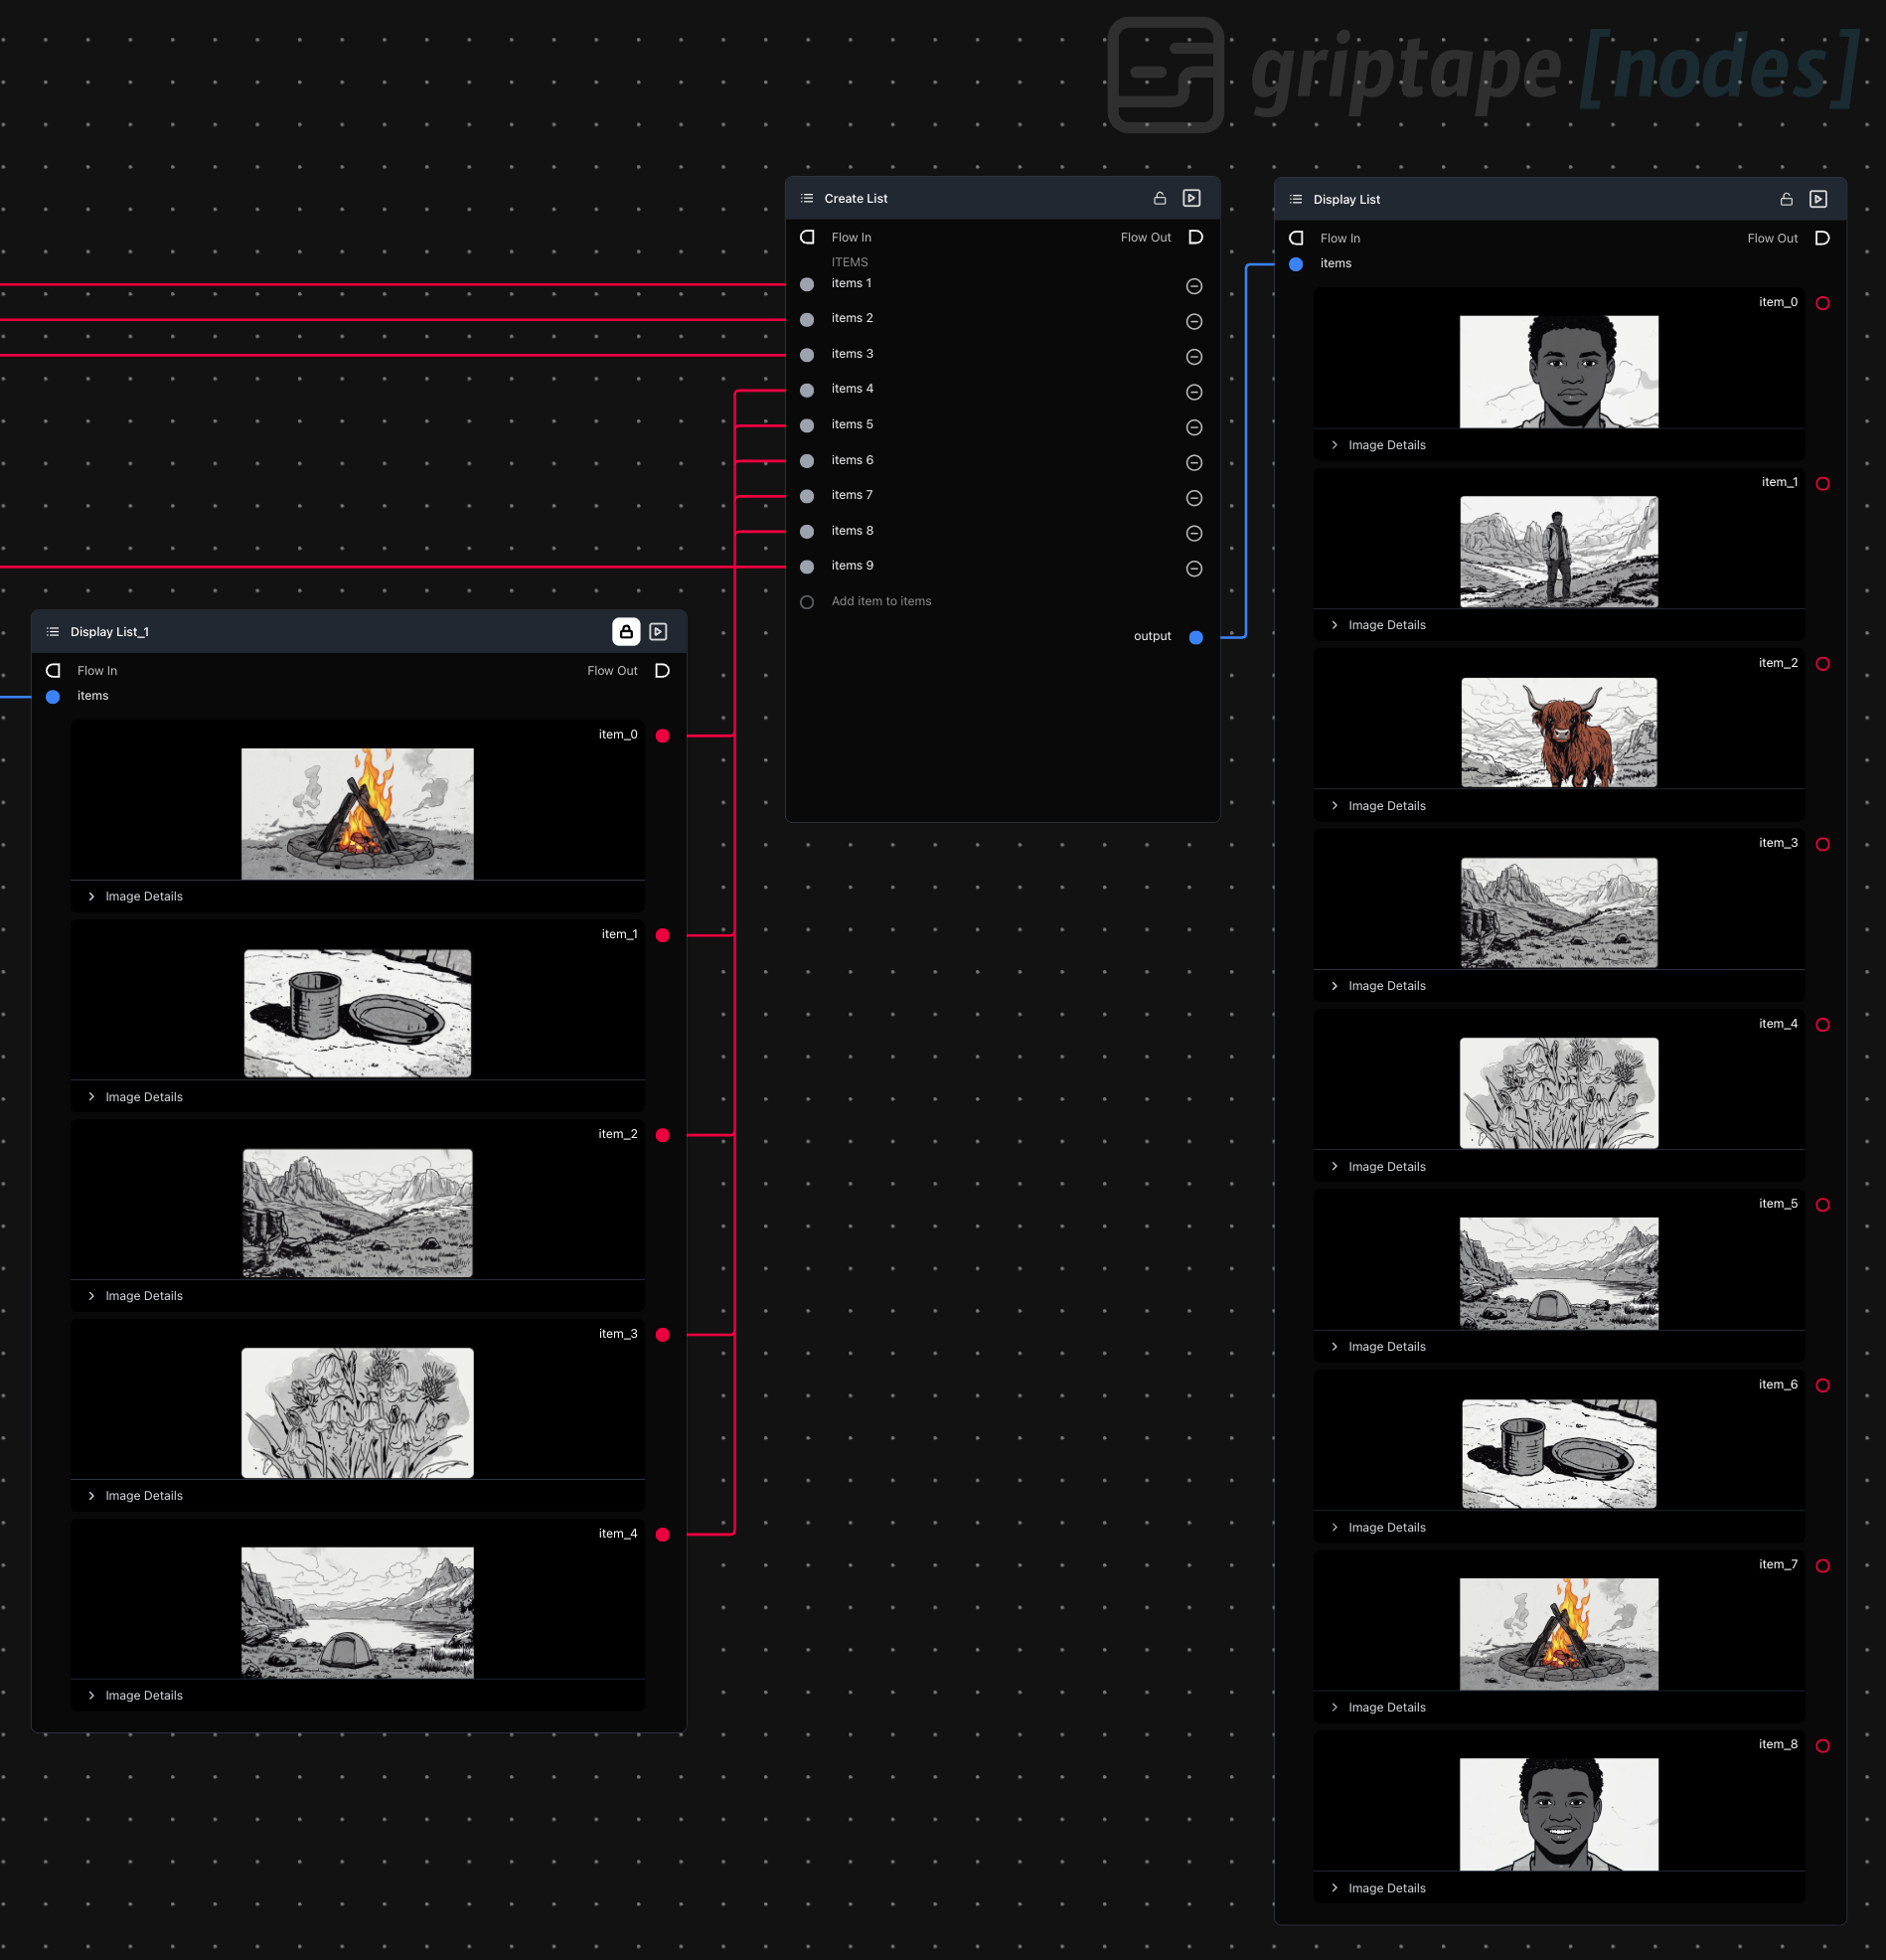
Assembling the Storyboard: Sequencing Your Scenes
With all our images ready, it’s time to put them in order. Using Griptape’s display list node, we arrange the images into the perfect sequence for our storyboard. This step is as simple as dragging and dropping, letting you experiment with pacing and flow until it feels just right.
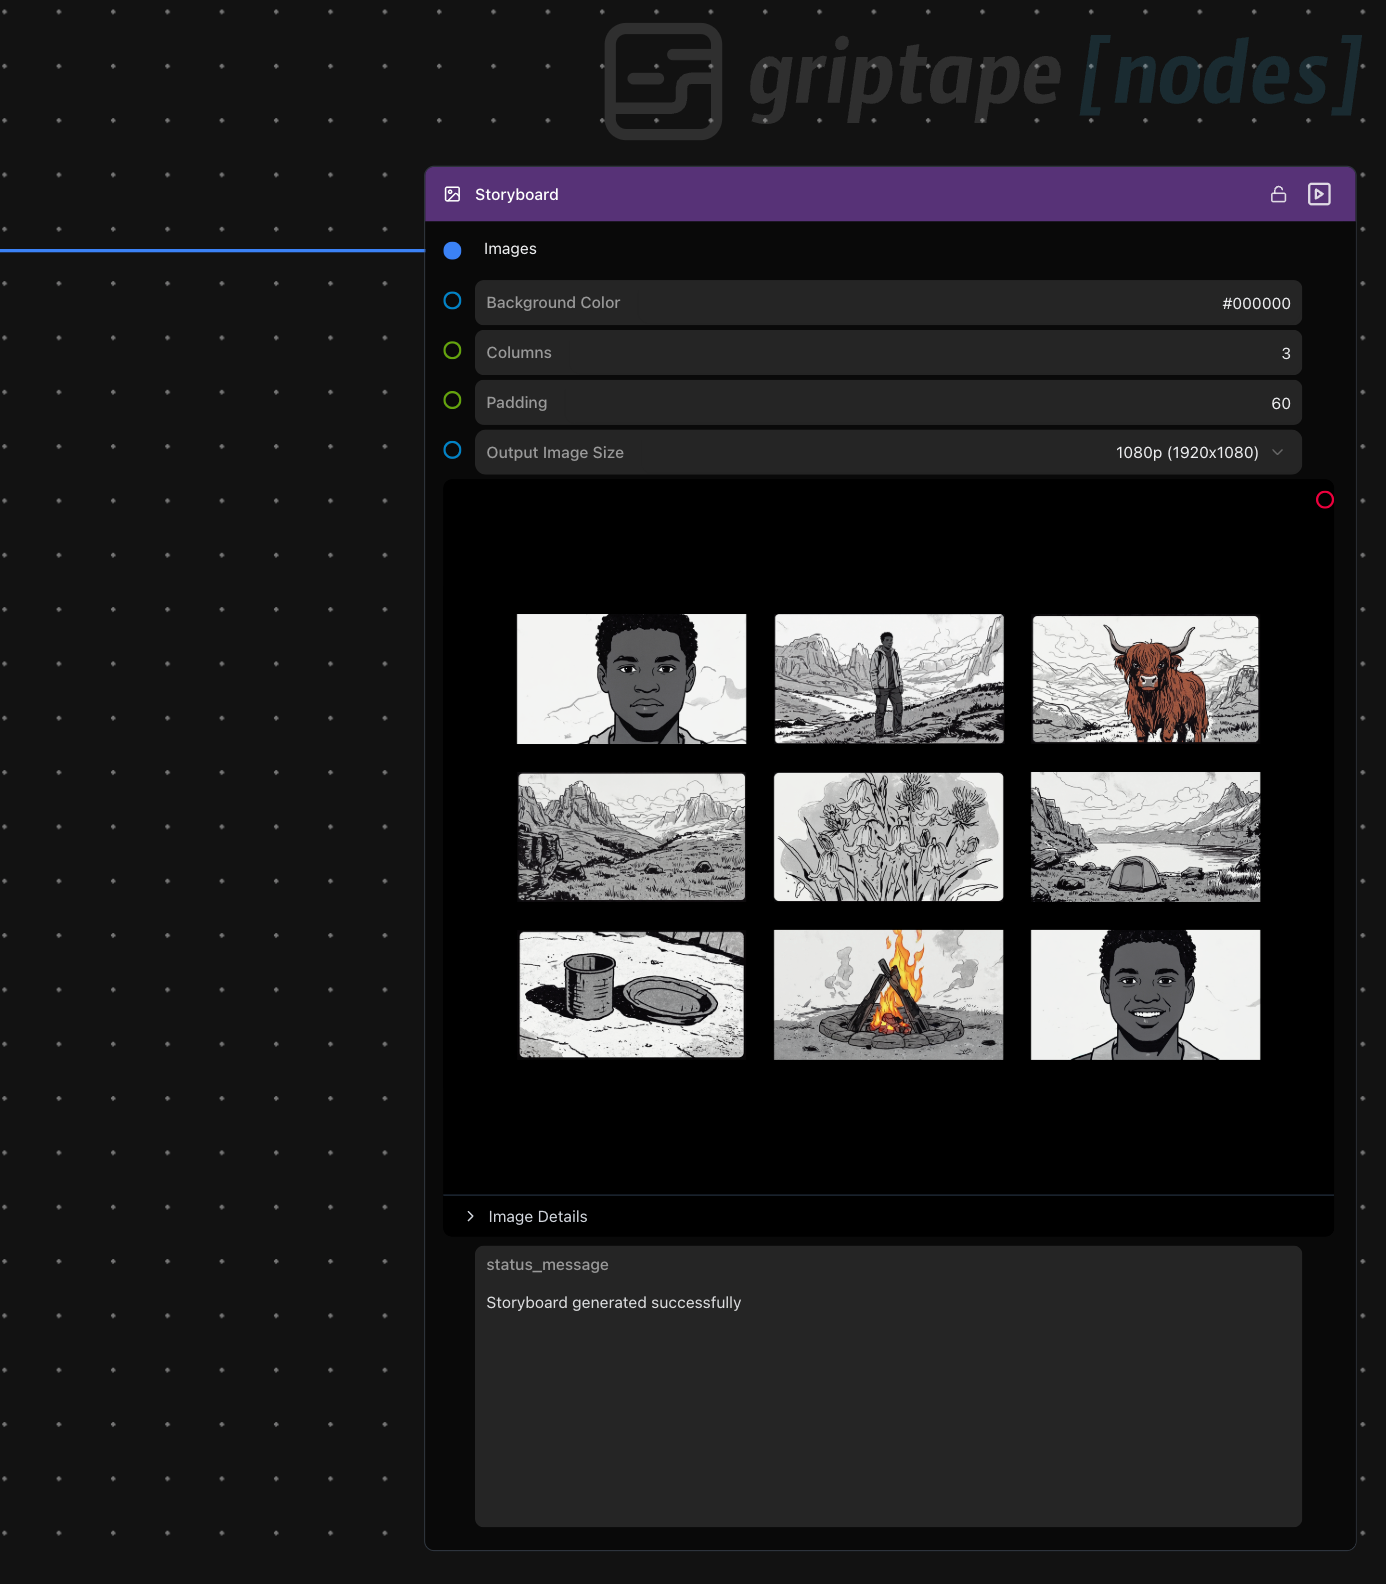
The Grand Finale: The Storyboard Node
Here’s where things get really cool. Griptape’s custom storyboard node takes your ordered list of images and arranges them into a polished, grid-based storyboard. You can tweak the background color, number of columns, padding, and output size to match your needs. In just seconds, you have a professional-looking storyboard image, ready to share with your team or client.
This node was a recent addition, coded in just 40 minutes using Cursor and Claude code. It’s a testament to how quickly you can extend Griptape’s capabilities to fit your workflow.
Extra Credit: Animating Our Storyboard
For a final flourish, we added a Google Veo3 image-to-video node to our flow and connected the output from the storyboard image to the image input on the new Veo Image-to-Video node. We then added a prompt to the Veo3 node:
animate all the cells in this image. maintain the formatting
Why This Workflow Rocks
- Consistency is King: Reference images ensure every frame matches your chosen style and characters.
- Speed and Flexibility: Batch processing with for-each nodes means you can generate entire storyboards in minutes, not hours.
- Customization: The storyboard node lets you present your work in a way that’s both beautiful and easy to digest.
Ready to Create Your Own Storyboard?
With Griptape and Runway, the only limit is your imagination. Whether you’re pitching a new campaign, planning a video shoot, or just exploring creative AI, this workflow puts powerful tools at your fingertips—no coding required.
Want to see more advanced node flows and creative use cases? Stay tuned to the Griptape blog. We’ve got plenty more inspiration coming your way. In the meantime, why not try building your own storyboard? Sign up for Griptape Nodes today and start turning your ideas into images!
Let your creativity run wild, and don’t forget to share your storyboards with us. We can’t wait to see what you create!